
Happy Sunday!
Today, I am sharing a cute Christmas card that was made by CASEing the catalogue. Let’s face it, we can all struggle for card design ideas, especially when we’re in a hurry or don’t have a lot of time. So why not look through your Stampin’ Up! catalogues. They are full of inspiration with lots of samples and different layouts that might help spark your creativity.
The start of this week was busy for me catching up with work and before I knew it, it was Wednesday and my first October class was that evening, so I only had a few hours to design three projects. (Did you know one of my nicknames is last minute Lynnie (LOL)?)
What is CASEing the catalogue?
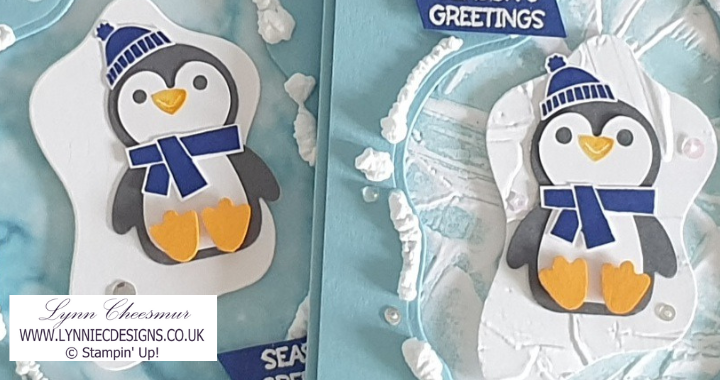
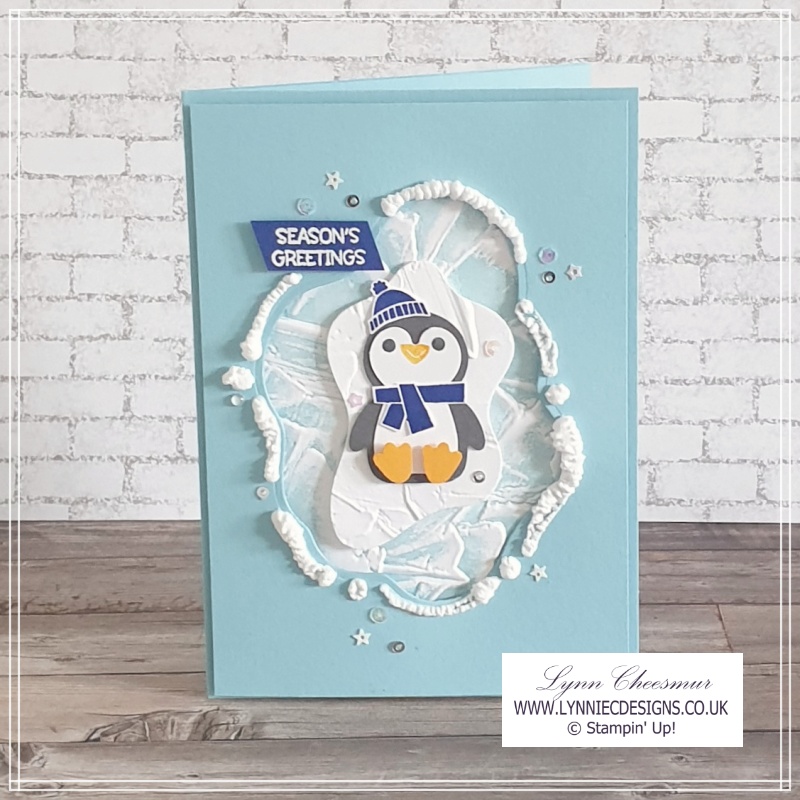
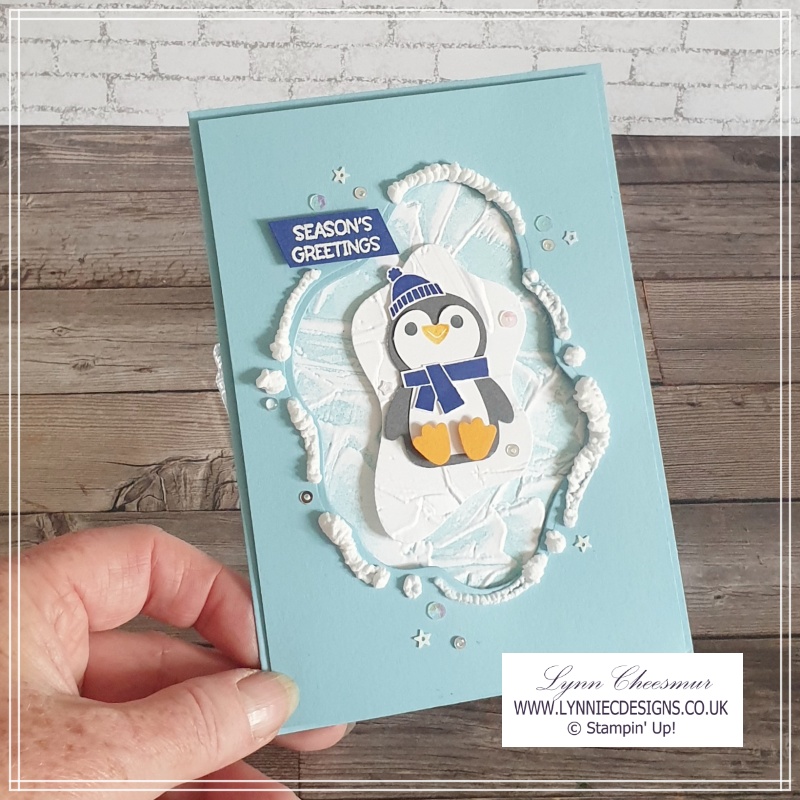
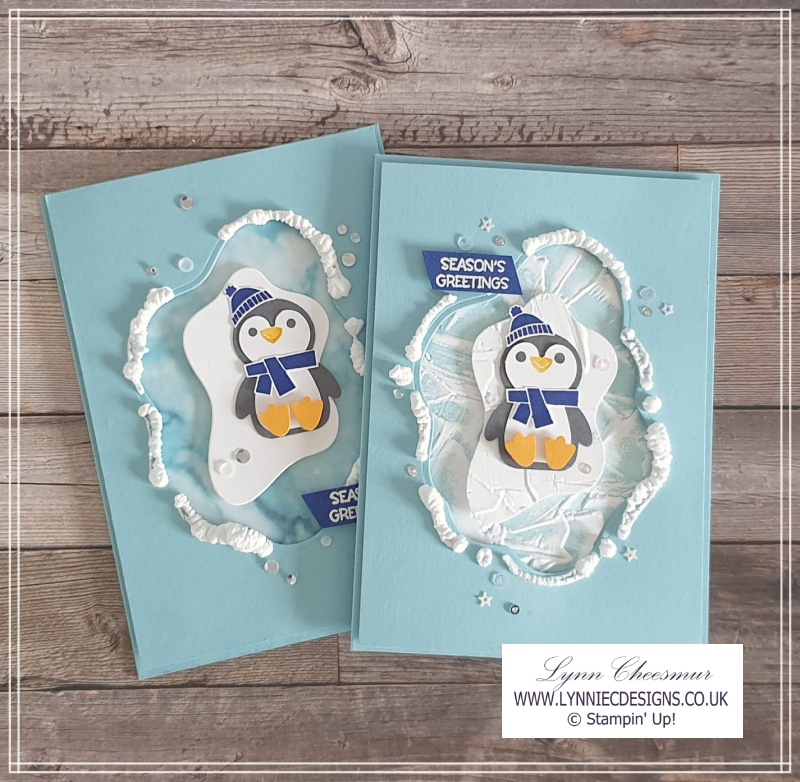
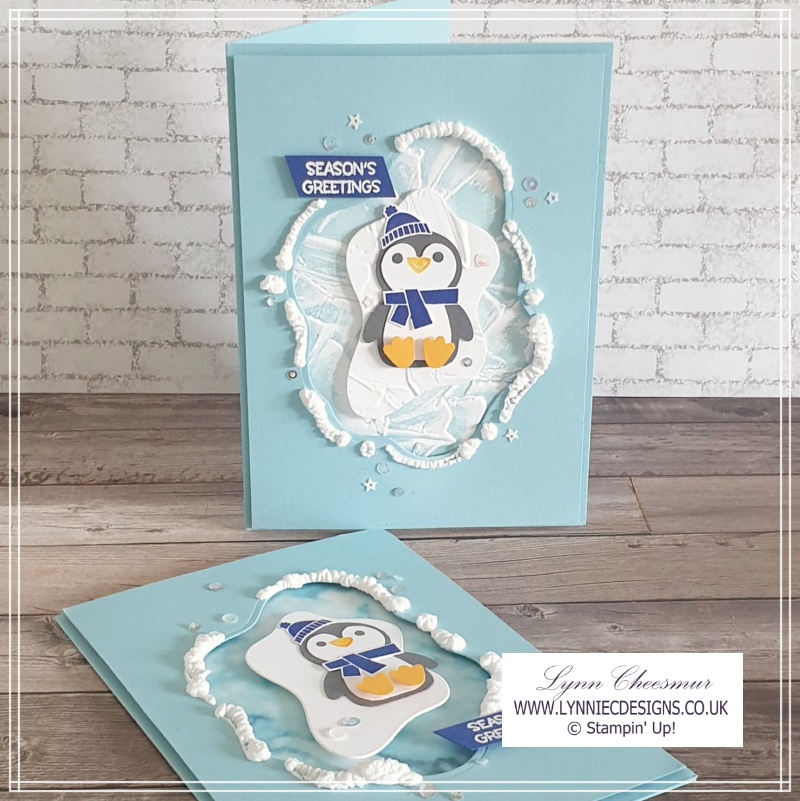
After designing two projects, I was flicking through the Jul to December 2022 mini catalogue for inspiration and came across three cards created with the Penguin Place stamp set and co-ordinating Penguin Builder punch and instantly knew I wanted to CASE (Copy and Selectively Edit or Copy and Share Everything) the stepped up version i.e. the card on the right. It was also the perfect opportunity to demo the Snowfall Accent Puff Paint! I have CASEd the catalogue before and you can see one example here. It was a lovely surprise to see this stamp set and punch in the mini catalogue.

At class we used Simply Marbellous designer series paper from my stash as I thought this looked like water for the backgroun but this paper was only available during Sale-a-bration so for the card I made in my video I added Balmy Blue ink to the Painted Texture 3D embossing folder and love the effect.
Top Tip
Did you know you can add ink to your embossing folders? It is such a fun way to get a different look from your embossing folders.
Supplies to make this cute CASEing the Catalogue Christmas card
Stamps:
Penguin Place
Cardstock:
- Balmy Blue 21cm x 14.8cm scored at 10.5cm
- Balmy Blue 10.2cm x 14.5cm
- Basic White 9.2cm x 13.5cm and 7cm x 10cm for stamping and die cutting
- Basic Gray, Mango Melody and Starry Sky for punching
Inks:
Balmy Blue, Basic Gray, Mango Melody, Starry Sky, Versamark
Tools and Adhesives:
Penguin Builder Punch, Layering Diorama dies, Painted Texture 3D Embossing Folder, White Emboss Powder, Heat Tool, Sparkle & Shine Sequins, Multipurpose Liquid Glue, Mini Glue dots
Instructions :
- Cut and score the card base
- First die cut the aperture and the iceberg
- Next emboss the iceberg before adding ink to the embossing folder and embossing the piece of basic white
- Then apply the Snowfall Accent Puff Paint around aperture and heat
- Emboss sentiment, trim and add with dimensionals
- Stamp scarf and hat then fussy cut
- Punch penguin pieces, assemble and glue in place
- Glue embossed layer then add next layer with dimensionals
- Add iceberg and penguin with dimensionals
- Finally add lots of sparkle with sequins
I really enjoyed CASEing the catalogue to make this fun Christmas card and using the Snowfall accent puff paint for the first time. It did take longer to dry than I expected but adds a fun element to the project. Remember when you get a new product it’s worth playing with it to learn how it works. I didn’t read the instructions to begin with and wondered why it stayed wet for so long!!
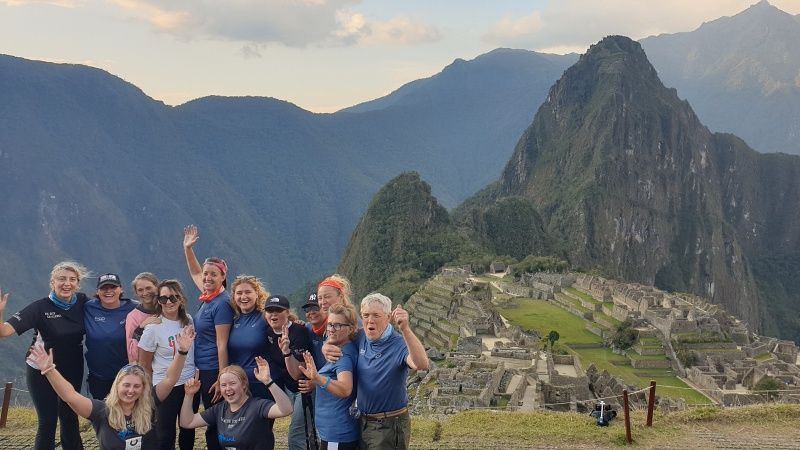
My adventure to Peru
I took part in a trek to Machu Picchu while raising money for St Barnabas House a local charity supporting adults with life-limiting illness. Although visiting Peru and Machu Picchu has been on my wishlist for many years, I did it in memory of my lovely mother-in-law Carol who sadly died in 2017 so it was emotional.
The Journey
We flew to Lima via Madrid and then on to Cusco, the ancient capital of Peru, spent the first day recovering from our epic journey and meeting the rest of the group (there were 24 of us in total plus guides – 6 of us were raising money for charities of our choice and the rest were supporting COCO (Comrades of Children Overseas) a Newcastle based charity).
Our itinerary
On Sunday we did a 3-4 hour acclimatisation walk before starting our trek early Monday morning. Instead of the Inca trail, we followed the Ancascocha trail and were surrounded by snow-capped mountains and passed by raging rivers and through remote mountain communities. As you can see below the landscape was absolutely breathtaking.

We trekked on average for 6-8 hours a day, at high altitudes (the highest point was 4,800 metres above sea level) and even camped for 3 nights with very basic facilities. I think, for me, that was one of the biggest challenges! The trek was harder than any of us expected but we all did it and my goodness what a sense of accomplishment. This is one of my favourite photo’s with Machu Picchu in the background. I’m still trying to sort through all the others!
I hope you love this cute Christmas card as much as me and will think about CASEing the catalogue, . The list of products I used is below so if you click on the images you will go directly to that item in my Stampin’ Up! on line store.
If you don’t already have a demonstrator, I would be so happy to help you with your Stampin’ Up! wish list and add you to my mailing list or answer any questions you may have. If you have any questions please email my at lynn@lynniecdesigns.co.uk and I will get back to you as soon as I can.
As always, thanks for stopping by and remember to keep it crafty.

Product List
")


