
Happy Sunday!
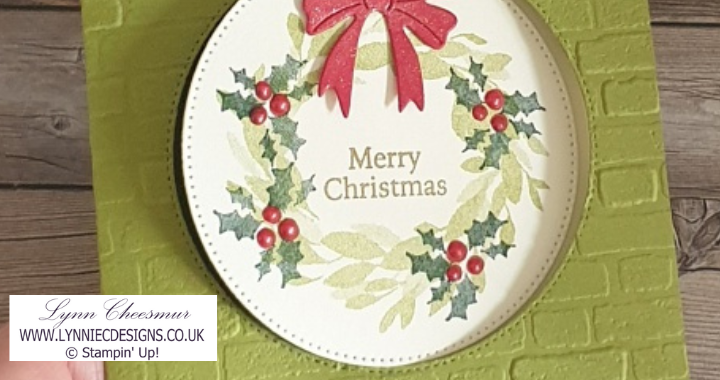
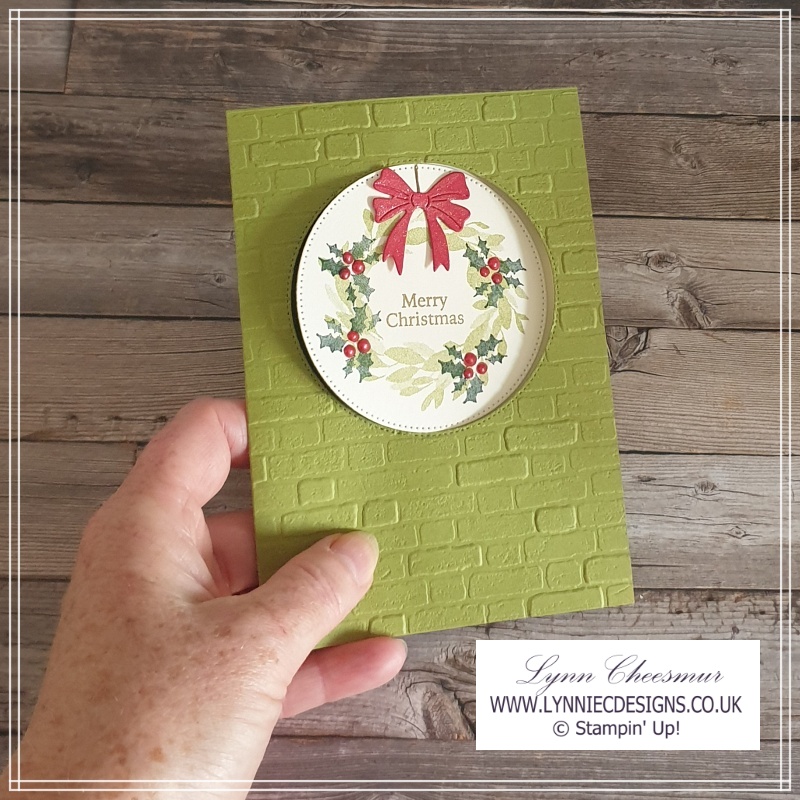
Today I’m going to show you how to make a fun Pop Out Swing card and this was one of the cards we made in my September classes. I learned how to make this type of fun fold last year (I think) from the talented Michaela Titheridge, a fellow Stampin’ Up! demonstrator in the UK. I’m always so happy to learn how to make a new (to me) fun fold. For my card I used the Cottage Wreaths Bundle from the Jan – Dec 2022 mini catalogue with the 3D Brick & Mortar Embossing Folder.
All of the cards we make in class this time of year are for Christmas. Every year I try to get ahead of the game so there’s not have a mad panic in a few months time to make enough cards to send! The Cottage Wreath bundle is part of the Gingham Cottage Suite Collection and another product I used from the collection is the Real Red Pearlized Enamel Effects to make the holly berries.
Fun Pop Out Swing card
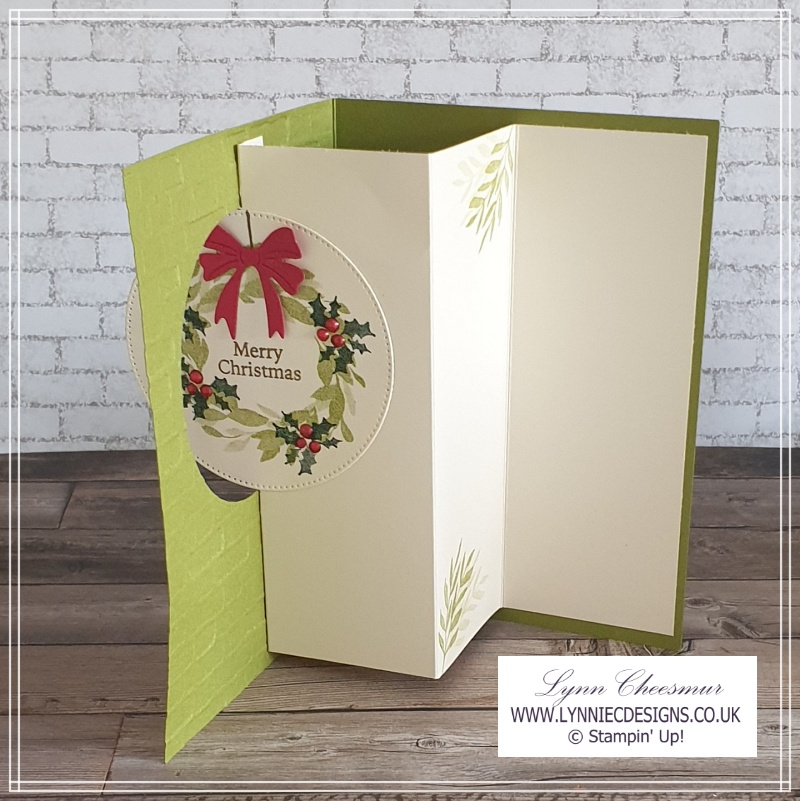
So this is the first time I’ve shared this type of fun fold here on my blog. As usual I got a bit tongue tied while recording my video tutorial but hopefully when you watch it you can follow how I made this fun pop out swing card rather than what I actually say! Looking at the top of the card, it’s easy to see where it gets it’s name from as the circle (you can use other shapes) actuall does pop out and swing when the card is opened.
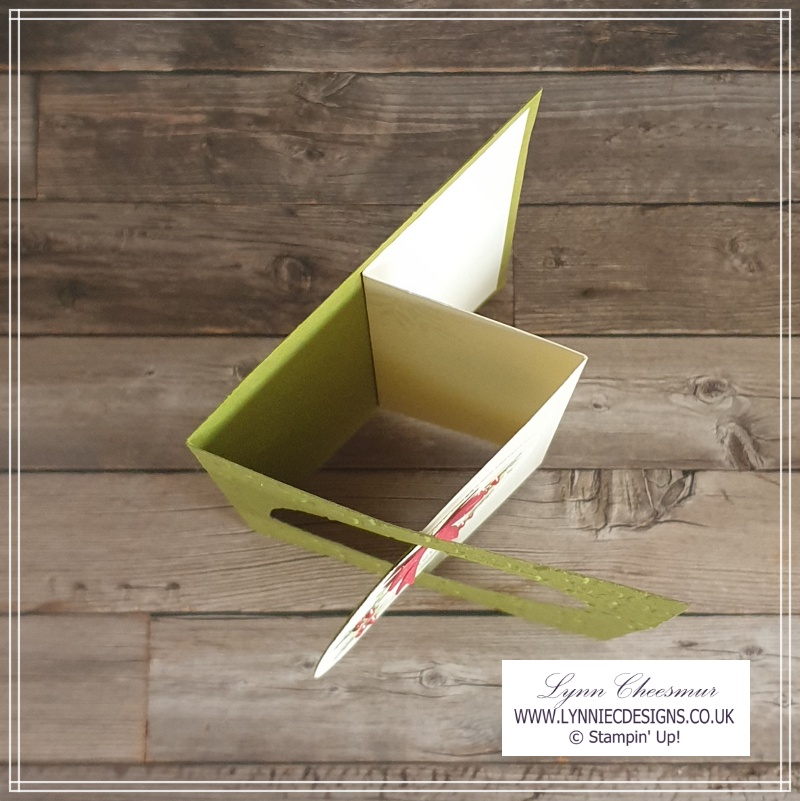
There are different ways to attach the inside panel to a pop out swing card – I decided to create tabs instead of adding additional strips of card.
You can click on the image below to watch me make this fun Pop Out Swing card. Embossing the front of the card makes it a little weak so if you wanted to give it more stability you could add and emboss another piece of card.
Supplies to make the fun Pop Out Swing card
Stamps:
Cottage Wreaths Bundle
Cardstock:
- Old Olive 21cm x 14.8cm scored at 10.5cm
- Very Vanilla 14cm x 16.5cm scored at 5cm, 10cm and 15cm
- Very Vanilla and Cherry Cobbler for die cutting
Inks:
Cherry Cobbler, Evening Evergreen, Pear Pizzazz, vening Evergreen, Soft Suede
Tools and Adhesives:
3D Brick & Mortar Embossing Folder, Real Red from Pearlized Enamel Effects Basics, Wink of Stella, Multipurpose Liquid Glue, Mini Glue dots
Instructions :
- Cut and score the card base
- Die cut circle from front of card base before embossing the card front
- Cut and score the inside layer
- Die cut bow and add a bit of sparkle with the Wink of Stella brush
- Stamp circle, inside layer and envelope
- Glue inside layer to back of card base and fold
- Close card and using a pencil draw the aperture on the inside layer so you can trim two sections to create three tabs (watch the video as this doesn’t make sense)
- Close card and add glue to the inside layer (including middle tab) then adhere stamped circle
- Open card and add the circle cut from card front to back of stamped circle (this step is optional but I like to hide the mess)
- With the insert closed add glue to two remaining tabs and close card (this should fix the inside layer so when the card is opened the circle actually does pop out and swing through the aperture)
- Add the bow with a mini glue dot.
- Go over the holly berries with the Real Red Enamel Effects

I really enjoyed making this fun pop out swing card and think the pop out element give this type of card a real wow factor. In the video I show you a couple of other pop out swing cards including one that went a little wrong!
Thank you so much for visiting my blog today, I hope you enjoyed this fun pop out swing card. I would love to know what you think of this project so please do leave me a comment. I have listed all the current products I used below and if you click on the images you will go directly to that item in my Stampin’ Up! on line store. Click here if you would like to read about how easy it is to shop with me 24/7.
If you don’t have a demonstrator, I would be happy to help you with your Stampin’ Up! wish list and add you to my mailing list or answer any questions you may have. You can email my at lynn@lynniecdesigns.co.uk
As always, thanks for stopping by and remember to keep it crafty.

Product List
")


