Happy Sunday!
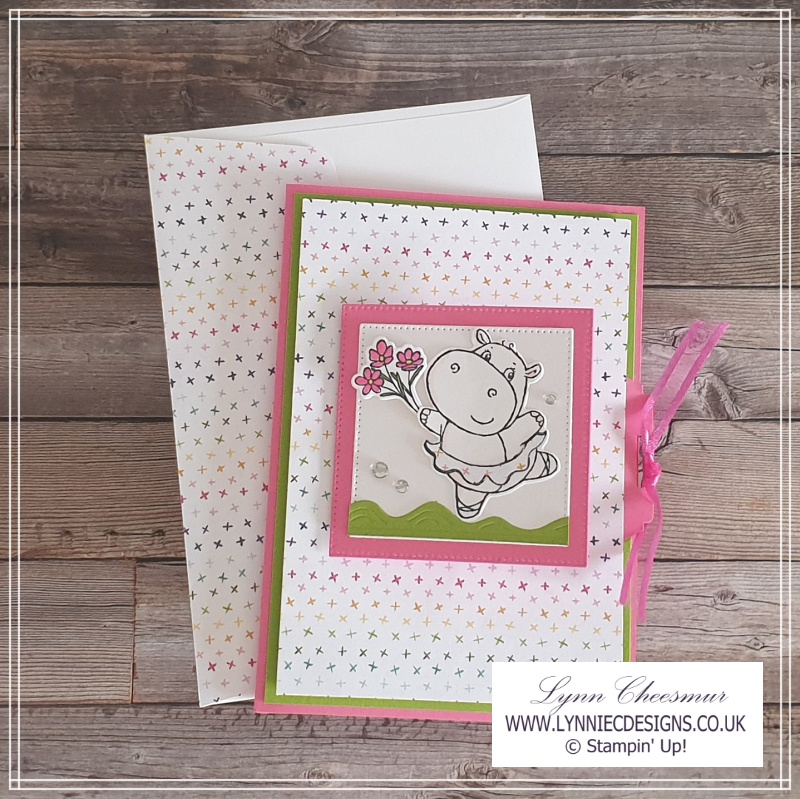
Today I want to show you how quick and easy it is to make a pull tab flap card. Now I may have mentioned once of twice before just how much I enjoy making fun fold cards and this style of card is quite easy once you know how. So for my cards I used the cute Hippest Hippos bundle and Happiness Abounds stamp set with some Hues of Happiness 12″ x 12″ designer series paper and other products by Stampin’ Up! I’m sorry that I didn’t post last Sunday – I had a bit of trouble recording my video so decided to wait until this week to share these cards.
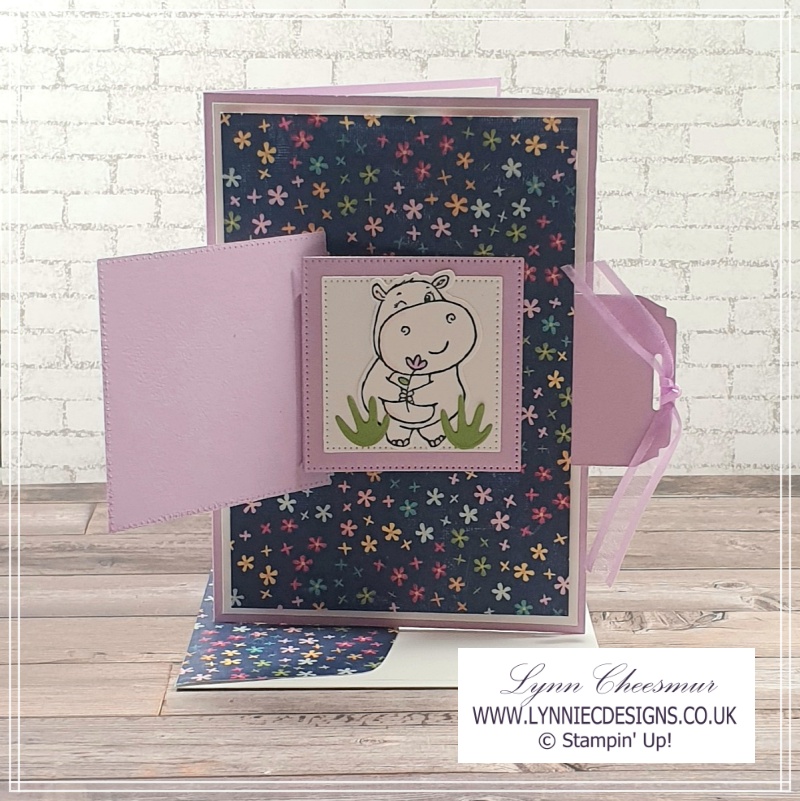
What is a Tab Pull Flap Card?
Have you seen this type of fun fold card before? I have only made a tab pull flap card once before but they were really popular a few years ago. Basically, when the tab with the ribbon is pulled to the right a hidden panel is revealed under the flap. As you can see the hidden panel on my card has the winking hippo holding a flower on it – so cute!
Sale-a-bration items
The Hippest Hippos stamp set and co-ordinating Hippo dies are products you can get for FREE during Sale-a-bration (so until the end of August 2022) with a qualifying order. The cute hippos remind me of The Moomintrolls, which was a TV series when I was younger. So the Moomins were a family of white, round fairy tale characters with large snouts that make them resemble hippos. Therefore my hippos are not coloured which made making the easy pull tab flap card quite quick.
Using patterned paper on my cards
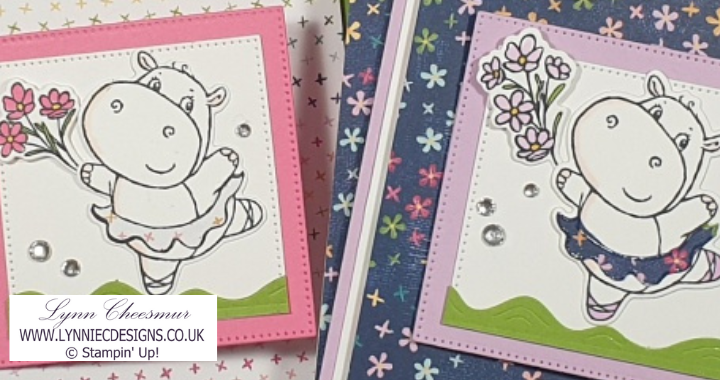
The patterned paper from the gorgeous Hues of Happiness dsp is so pretty. If you click here you can see another simple card that I made using this paper a while ago. I used a technique called paper piecing, where you stamp the image again on some dsp, trim with your paper snips and glue over the original stamped image, to give the dancing hippo a paper tutu. I also added the same paper to the envelope flaps, which is an easy and fun way to decorate your envelope to match your card.
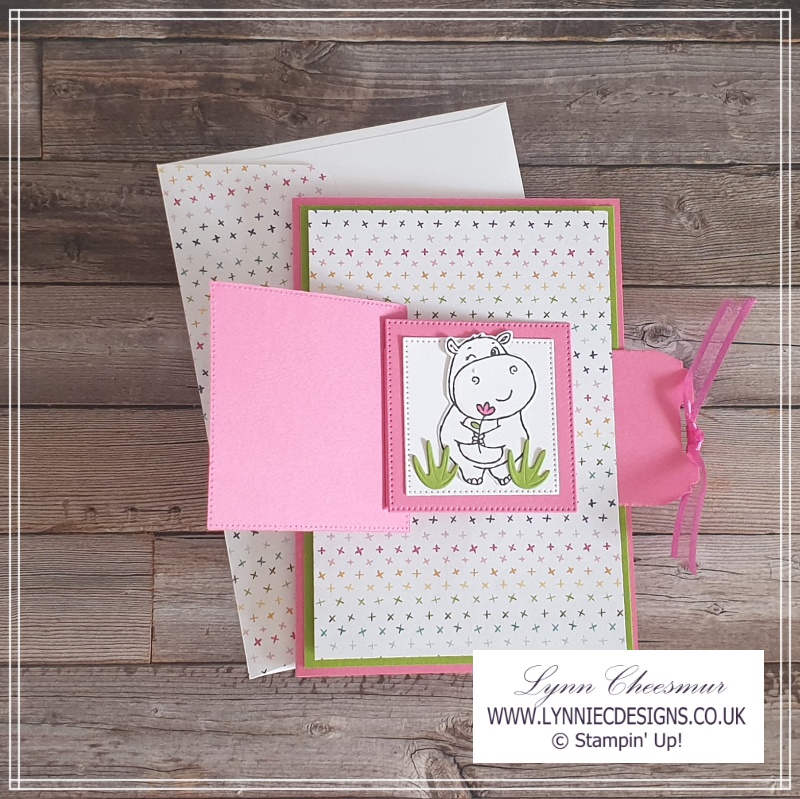
The card stock used for each tab pull flap card was inspired by the pattern on the paper I used. So for my first card the base is Fresh Freesia with a layer of Basic White under the pretty patterned paper and the other card has a Polished Pink base with a layer of Granny Apple Green under the paper.
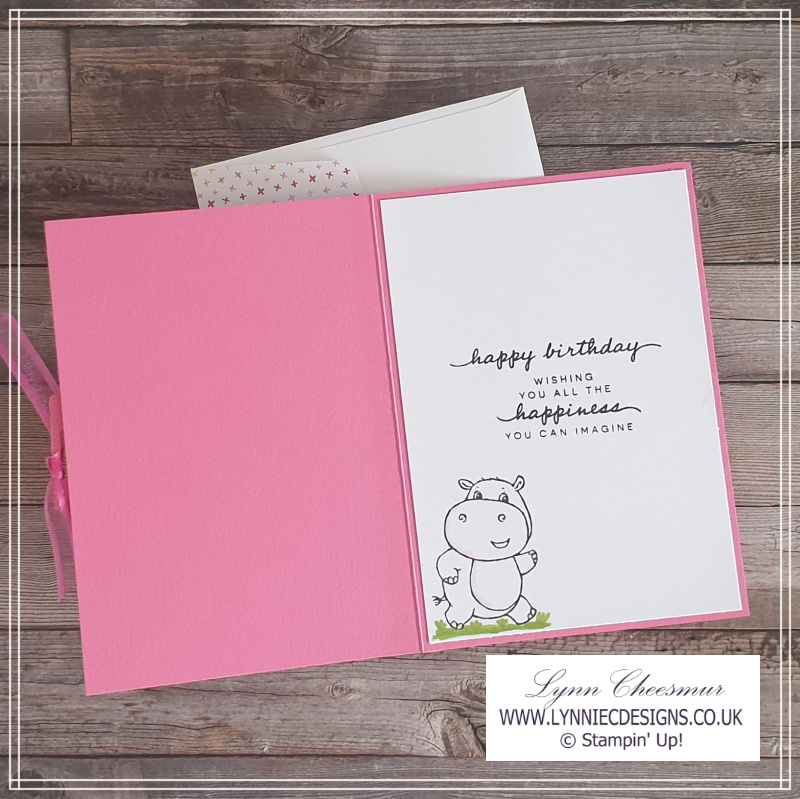
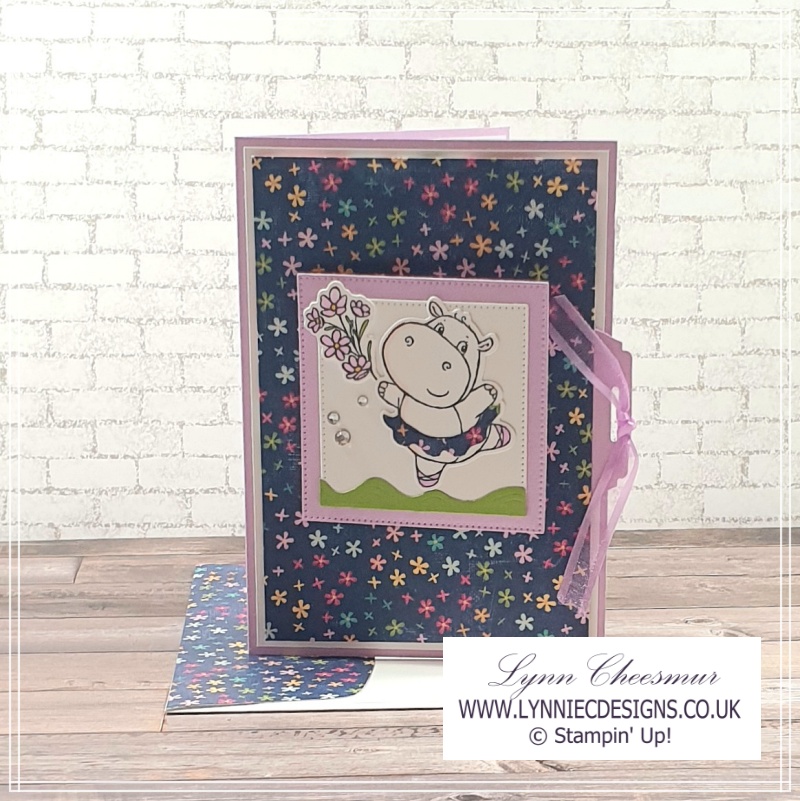
Although I’ve only shown the inside of the second card here, they are both the same. I stamped the third hippo on the inside with two of the sentiments from the Happiness Abounds stamp set.
Supplies
Stamps:
Hippest Hippos and Happiness Abounds
Cardstock for card #1:
- Fresh Freesia 21cm x 14.8cm and quarter of a sheet for die cutting
- Basic White 10cm x 14.3cm (x2) and quarter of a sheet for stamping and die cutting
- Hues of Happiness 12” x 12” dsp 9.5cm x 13.8cm and extra for envelope flap and skirt
- Fresh Freesia 15.5cm x 4.8cm scored at 5cm and 6cm (for the mechanism)
- Granny Apple Green scrap
Cardstock for card #2:
- Polished Pink 21cm x 14.8cm and quarter of a sheet for die cutting
- Granny Apple Green 10cm x 14.3cm and scrap
- Basic White 10cm x 14.3cm and quarter of a sheet for stamping and die cutting
- Hues of Happiness 12” x 12” dsp 9.5cm x 13.8cm
- Fresh Freesia 15.5cm x 4.8cm scored at 5cm and 6cm (for the mechanism)
Inks:
Memento Black
Accessories:
Basic Rhinestones, Fresh Freesia and Polished Pink Open Weave Ribbon
Tools and Adhesives:
Hippo and Stylish Shapes dies, Label Me Fancy Punch, Stampin’ Blends (SU1000, Daffodil Delight, Granny Apple Green, Fresh Freesia, Polished Pink), Multipurpose Liquid Glue, Foam Adhesive Sheet, Stampin’ Dimensionals, Tear & Tape, Trimmer, Paper Snips
Instructions to make a tab pull flap card:
- Cut and score card base
- Glue layer to card front
- Trim slot in dsp layer for mechanism with trimmer at 4.5cm and 3.8cm from right hand edge
- Cut and score mechanism and punch one end to create pull tab
- Stamp hippos, colour with Stampin’ Blends and die cut
- Paper piece a skirt on the dancing hippo
- Die cut and layer squares and decorate
- Insert mechanism through slot and add squares with Tear & Tape
- Glue mechanism to dsp and add ribbon
- Add dsp to card front with Foam Adhesive Sheet
- Stamp hippos and sentiments on inside panel
- Colour hippo with Stampin’ Blends
- Add rhinestones
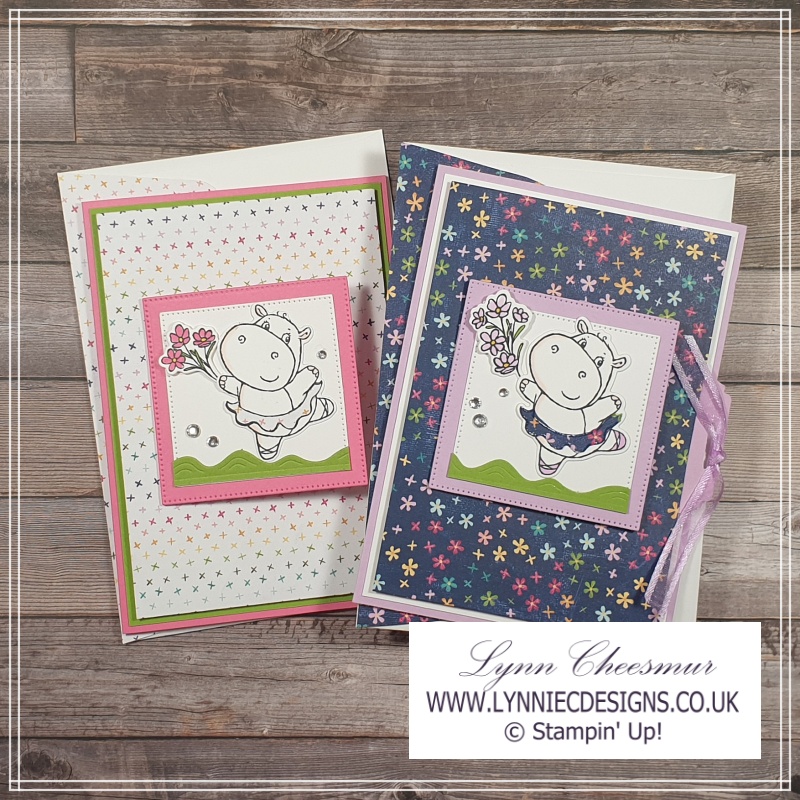
Above you can see both tab pull flap cards together do you have a favourite? Looking at the fronts you can’t tell they are fun fold cards can you? It’s such a fun surprise to have the flap open to reveal the hidden panel.
I didn’t like the first video I made so I did it a second time but hit pause and forgot to hit record again. So it really was third time lucky but I had upgraded my editing software and it wouldn’t upload properly. That’s why I didn’t share anything on here last week! You can click on the box below to watch me make the first card in a quick video over on my YouTube channel.
Thank you for visiting my blog today, I hope you enjoyed my projects. I’ve listed all the products used below so you can click on the images to go directly to that item in my Stampin’ Up! on line store. Click here if you want to read about how easy it is to shop with me 24/7.
If you don’t have a demonstrator and would like to get your hands on the new mini catalogue and Sale-a-bration leaflet get in touch. I would be happy to add you to my mailing list or answer any questions you may have.
As always, thanks for stopping by and remember to keep it crafty.

Product List
")

")
 Designer Series Paper")


 Open Weave Ribbon")
 Open Weave Ribbon")


That piece is the propeller for the boat.
Yes, of course, I don’t know why I didn’t see it! Thank you for putting me out of my misery!