
Hello, my crafty friends! 👋
Welcome to another Be Inspired Blog Hop! If you’re not starting the hop here, you’ve probably arrived from one of my wonderfully talented Stampin’ Up! friends — and as always, I’m so grateful you’ve stopped by.

Layouts That Always Work
This month’s theme, Layouts That Always Work, really got me thinking about my own crafting habits. When I sit down to make a simple card, I might change colours, stamps or embellishments, but if I’m honest, the “structure” of my cards stays remarkably consistent. And there’s a very good reason for that — these layouts work every single time.
Over the years, I’ve learned that having a reliable framework makes card making quicker, less overwhelming, and just as creative. Instead of staring at a pile of supplies wondering where to start, I fall back on a go‑to layout that I know will look balanced and polished.
My Go-To Card Layout Formula
If you break my usual designs down, most of my cards follow this simple sequence:
- Card base
- Mat layer
- Patterned paper or embossed layer
- A shape for the focal point
- Decorating and embellishing**
It’s such a straightforward recipe, but it’s incredibly versatile. You can switch out any element — textures instead of patterns, bold colours instead of neutrals, simple shapes or intricate dies — and still end up with a card that feels intentional and cohesive.
Today’s Card Project
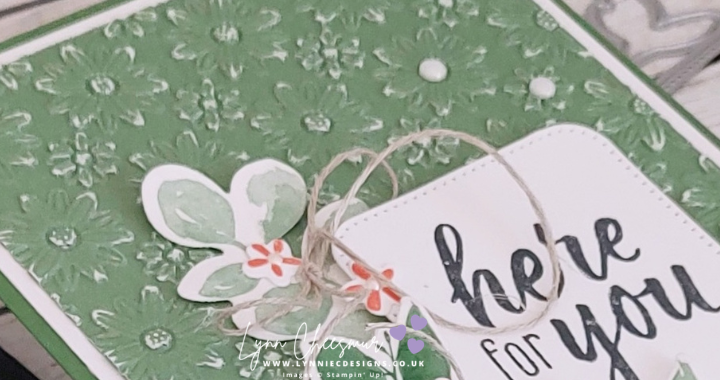
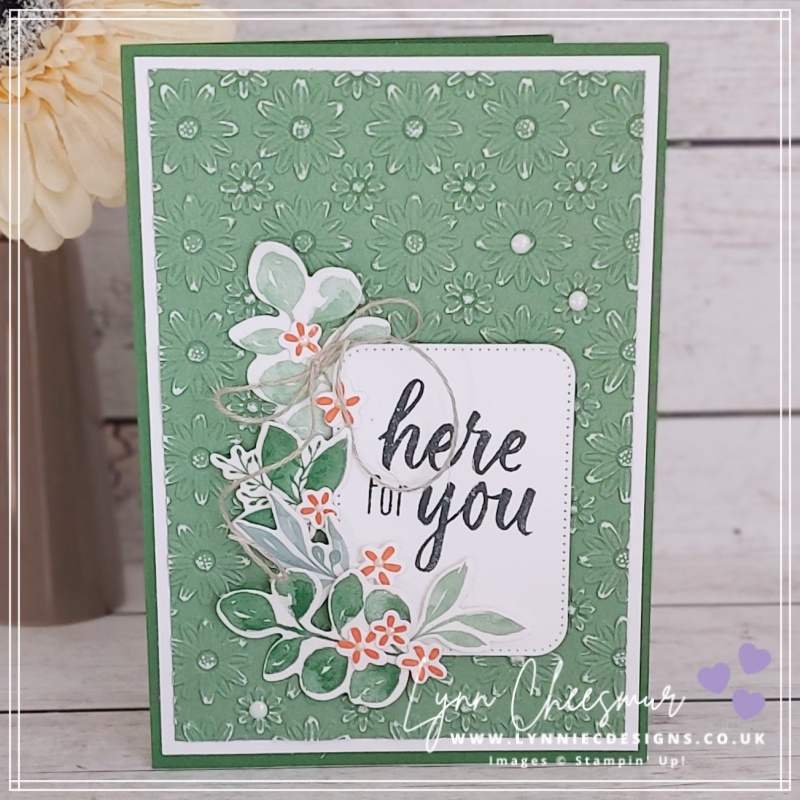
For today’s hop, I’m sharing a card that perfectly demonstrates this “layouts that always work” approach, using a calming green and white palette and plenty of texture.
Here’s what I’ve used:
- Garden Green and Basic White cardstock
- Garden Green Two-Tone Cardstock
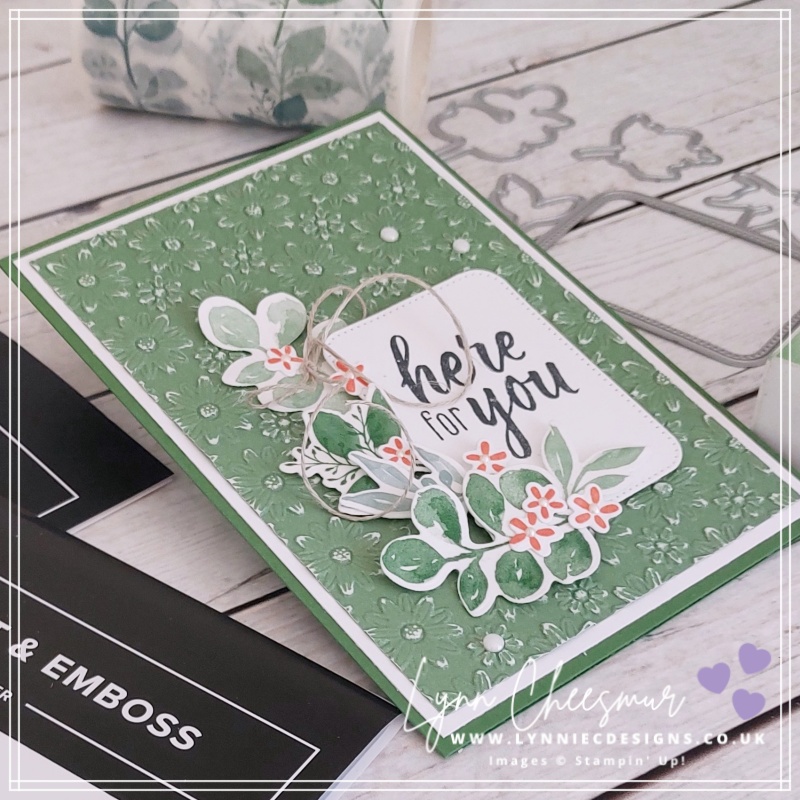
- Greenery Lane bundle and washi tape
- Nested Essential dies
- Lazy Daisy 3D Embossing Folder
- Linen Thread
- Pearls of Beauty embellishments
I started with a Garden Green card base, added a simple white mat layer, and then layered on embossed cardstock to bring in texture without overwhelming the design. To really make the embossing pop, I used a nail file to lightly sand the raised image. The focal point is kept clean and simple with a sentiment and die-cut greenery, letting the layout do the heavy lifting. Finished off with a linen thread bow and a few Pearls of Beauty, the card feels soft, elegant, and timeless.
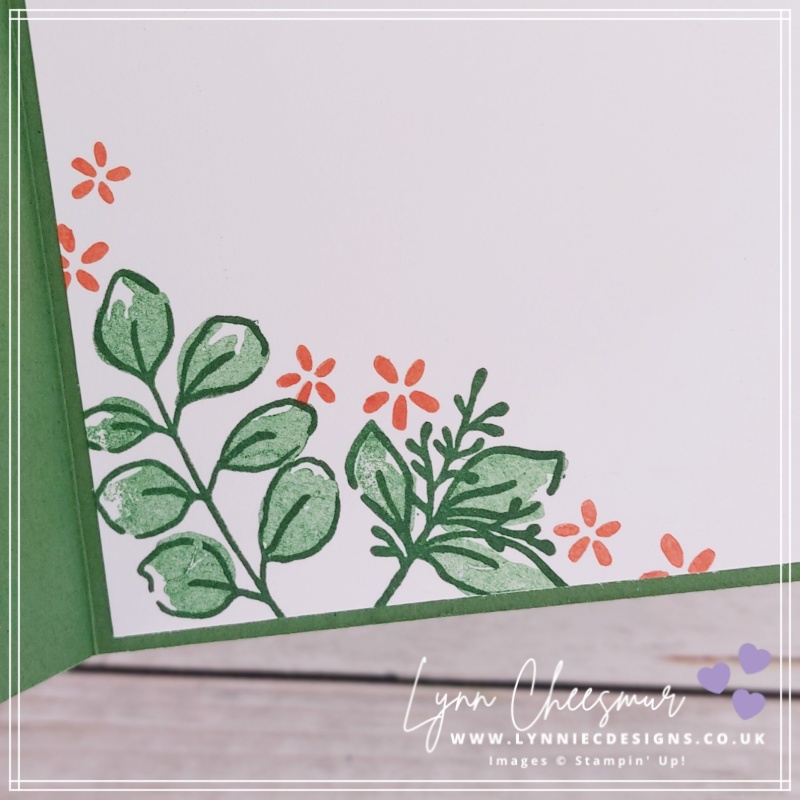
This is exactly why I love sticking to a proven layout — it allows the products and details to shine without overthinking the design. And don’t forget to stamp the inside layer
Why Layouts Matter
Having a handful of layouts you can rely on is such a game changer:
- They save time when you need a quick card
- They can reduce creative overwhelm
- They’re ideal for batch card making
- They work for any occasion with a few tweaks
Thank you so much for stopping by today. I hope this project inspires you to look at your own crafting habits and maybe identify a few layouts that always work for you, too.

Happy crafting 💜

Be Inspired Design Team Blog Roll:
- Andrea Sargent
- Angela Meireitz-Reid
- Annette Elias
- Brian King
- Emma Goddard
- Heather Thomas
- Lynn Cheesmur (you are here 💜)
- Maheswari Rajaguru
![Greenery Lane Bundle (English) [ 166877 ]](https://assets1.tamsnetwork.com/images/EC042017NF/166877s.jpg "Greenery Lane Bundle (English) [ 166877 ]")
![Greenery Lane Washi Tape [ 166880 ]](https://assets1.tamsnetwork.com/images/EC042017NF/166880s.jpg "Greenery Lane Washi Tape [ 166880 ]")
![Lazy Daisy 3 D Embossing Folder [ 167196 ]](https://assets1.tamsnetwork.com/images/EC042017NF/167196s.jpg "Lazy Daisy 3 D Embossing Folder [ 167196 ]")
![Nested Essentials Dies [ 161597 ]](https://assets1.tamsnetwork.com/images/EC042017NF/161597s.jpg "Nested Essentials Dies [ 161597 ]")
![Garden Green A4 Card Stock [ 108605 ]](https://assets1.tamsnetwork.com/images/EC042017NF/108605s.jpg "Garden Green A4 Card Stock [ 108605 ]")
![Basic White A4 Cardstock [ 166781 ]](https://assets1.tamsnetwork.com/images/EC042017NF/166781s.jpg "Basic White A4 Cardstock [ 166781 ]")
![Garden Green 12" X 12" (30.5 X 30.5 Cm) Two Tone Cardstock [ 166665 ]](https://assets1.tamsnetwork.com/images/EC042017NF/166665s.jpg "Garden Green 12\" X 12\" (30.5 X 30.5 Cm) Two Tone Cardstock [ 166665 ]")
![Tuxedo Black Memento Ink Pad [ 132708 ]](https://assets1.tamsnetwork.com/images/EC042017NF/132708s.jpg "Tuxedo Black Memento Ink Pad [ 132708 ]")
![Calypso Coral Classic Stampin' Pad [ 147101 ]](https://assets1.tamsnetwork.com/images/EC042017NF/147101s.jpg "Calypso Coral Classic Stampin' Pad [ 147101 ]")
![Garden Green Classic Stampin' Pad [ 147089 ]](https://assets1.tamsnetwork.com/images/EC042017NF/147089s.jpg "Garden Green Classic Stampin' Pad [ 147089 ]")
![Linen Thread [ 104199 ]](https://assets1.tamsnetwork.com/images/EC042017NF/104199s.jpg "Linen Thread [ 104199 ]")
![Pearls Of Beauty [ 167098 ]](https://assets1.tamsnetwork.com/images/EC042017NF/167098s.jpg "Pearls Of Beauty [ 167098 ]")
A beautiful card Lynn. There is so much to love – your layering, embossing with sanded texture, the delightful washi tape leaves around the label. Love, love love. xxx
Thank you so much Andrea. You’re very kind. Not my usual colour palette …. no purple 😂 xxx
Beautiful card, Lynn. Enjoy your day!
Thank you so much Hilda. You too!
The card is beautiful. Thanks for sharing!
I’m so happy you like the card – I enjoy being part of this hop! It helps me focus and share something!
I love this layout, Lynn – and I love the gorgeous backdrop you created with the two-tone cardstock. ♥
Ah, thank you so much Brian. I’m totally converted to the two-tone cardstock now 💜
Love this Layout, such a beautiful card!
Thank you so much Maheswari!
Such a pretty card and great layout x
Thank you so much – it’s nice when a plan comes together x