Happy Sunday!
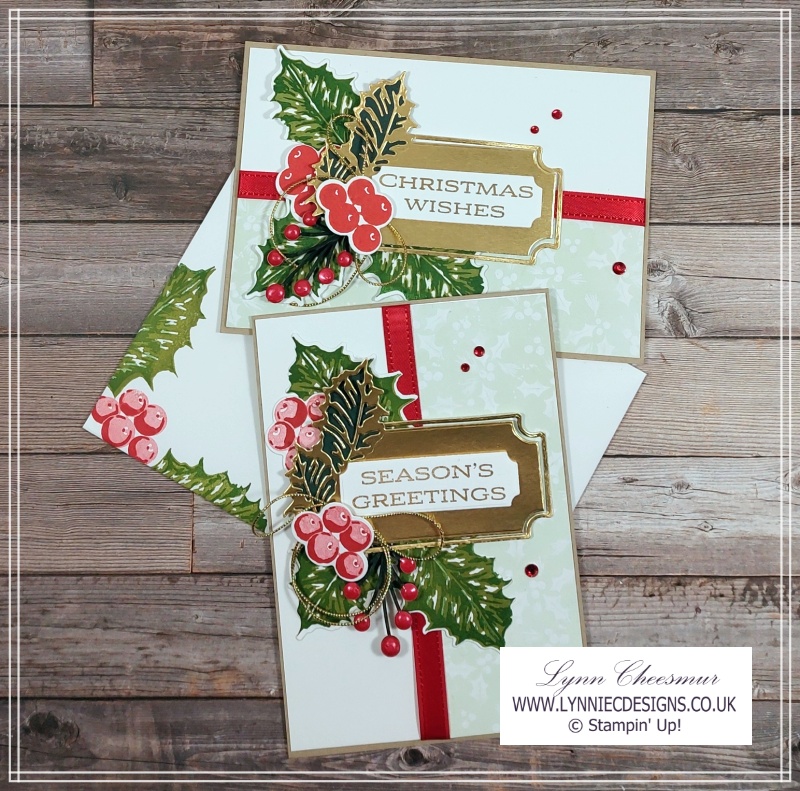
Today I want to show you how to use the same layout but in a different way to make two quick Christmas cards. To be honest they were supposed to be exactly the same but I stamped the sentiment on the inside wrong so decided to turn the card and I think it looks good both ways.
For the cards I used the Leaves of Holly bundle from the Stampin’ Up! July-December 2022 mini catalogue. With a new catalogue coming in January 2023 this bundle is retiring so if you want to get your hands on these lovely products you can head to my online shop by clicking on the product photos at the bottom of this post. But be quick when they’re gone they’re gone! It’s amazing how different each card looks even though I’ve used the same layout. You can see me make the above card later in this post or over on my YouTube channel here
The layout we made in class
The Christmas card below was the one we made in my November card classes and if you would like to see more Christmas card inspiration you can find one of the other cards we made here. It is nice to use a layout in a different way and this is a great example.

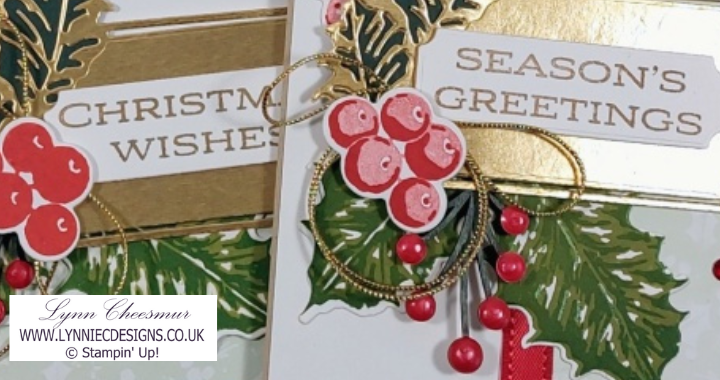
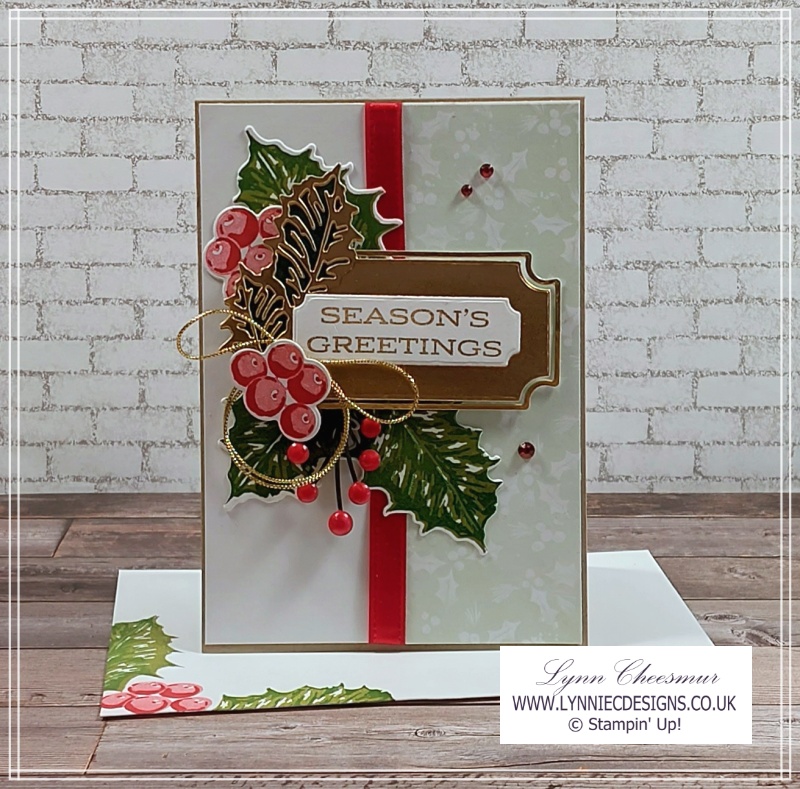
First, I start with a card base of Crumb Cake. Then, for the front panel I added a strip of patterned paper from Painted Christmas 12″ x 12″ designer series paper pack to Basic White. To hide the edge of the dsp I added some retired ribbon from my stash. Next I stamped the holly leaves, berries and sentiment before using the co-ordinating Holly Berry dies. The label was die cut from a piece of gold foil and a piece of Evening Evergreen was added behind the foil leaves. To add an extra feature, the stem of a Textural Element was coloured with a dark Evening Evergreen Stampin’ Blend and Real Red Pearlised Enamel Effect Basic makes the berries dimensional. Finally the fun part is assembling all the elements until you’re happy with the layout.
Same but different layout
As you can see from the photo’s above, I used the same layout but one card is landscape and the other is portrait.

The berries on the second card were stamped slightly differently with the first layer stamped off to make it lighter and the detail stamped full strength. As I didn’t have any red gems, I coloured some Rhinestones Basics with a Cherry Cobbler Stampin’ Blend – such a great way to make gems to match your projects.

Supplies you need to make these christmas cards
Stamps / Bundle:
Leaves of Holly Bundle and Christmas to Remember
Cardstock:
- Crumb Cake 10.5cm x 29.6 scored @ 14.8cm
- 2 x Basic White 10.2cm x 14.5cm
- Painted Christmas 12″ x 12″ designer series paper 5cm x 14.5cm
- Basic White quarter sheet for stamping and die cutting
- Evening Evergreen scrap
- Gold Foil 7cm x 12cm
Inks:
Crumb cake, Garden Green, Old Olive, Real Red
Accessories:
Real Red Satin Ribbon (retired), Textural Element, Pearlised Enamel Effect Basics, Simply Elegant Trim, Rhinestone Basics, Stampin’ Blends – Cherry Cobbler and Evening Evergreen
Tools and Adhesives:
Multipurpose Liquid Glue, Tear & Tape, Mini Stampin’ Dimensionals
Like a lot of the cards I make they are quick and easy to make. It was a happy accident that the second card turned out the way it did but I think it looks great. What do you think?
If you would like to watch me make the blue and silver card click on the video below.
Finally, all the current products used are listed below and you can buy them in my Stampin’ Up! online shop. If you would like more information about shopping with me click this link.
That’s all from me today, as always thanks for stopping by and remember to keep it crafty.

Product List
")
")
 Designer Series Paper")


