Hello there
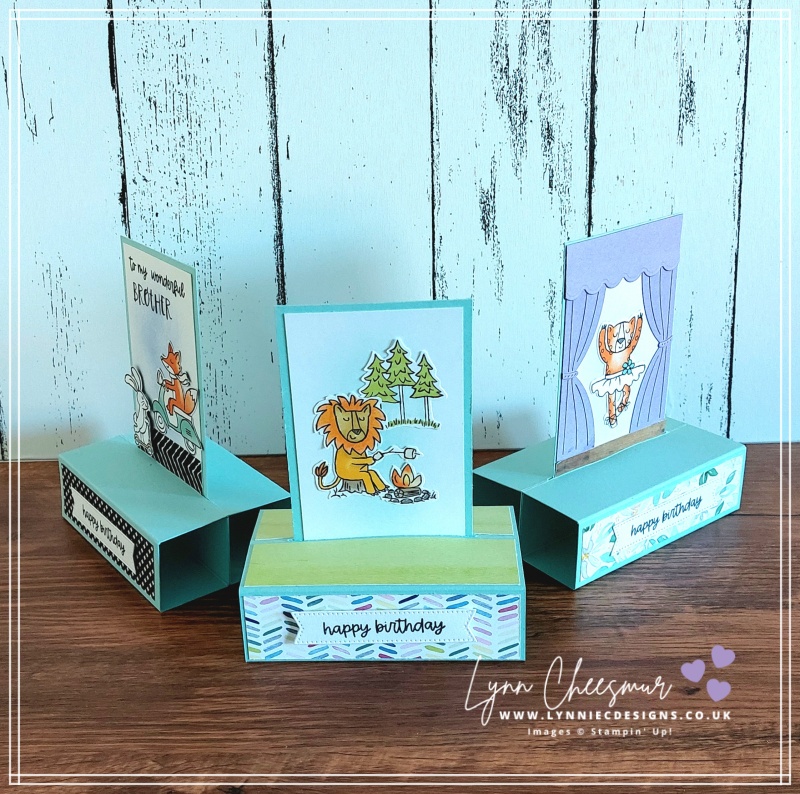
Today I want to show you how easy it is to make some simple pop up birthday cards. In the examples I’m sharing, there is very little stamping because I fussy cut some of the cute critters in the Zany Crew 12″ x 12″ designer series paper. That pretty patterned paper is part of the Zoo Crew Suite Collection that includes the Zany Zoo bundle in the Stampin’ Up! annual catalogue.
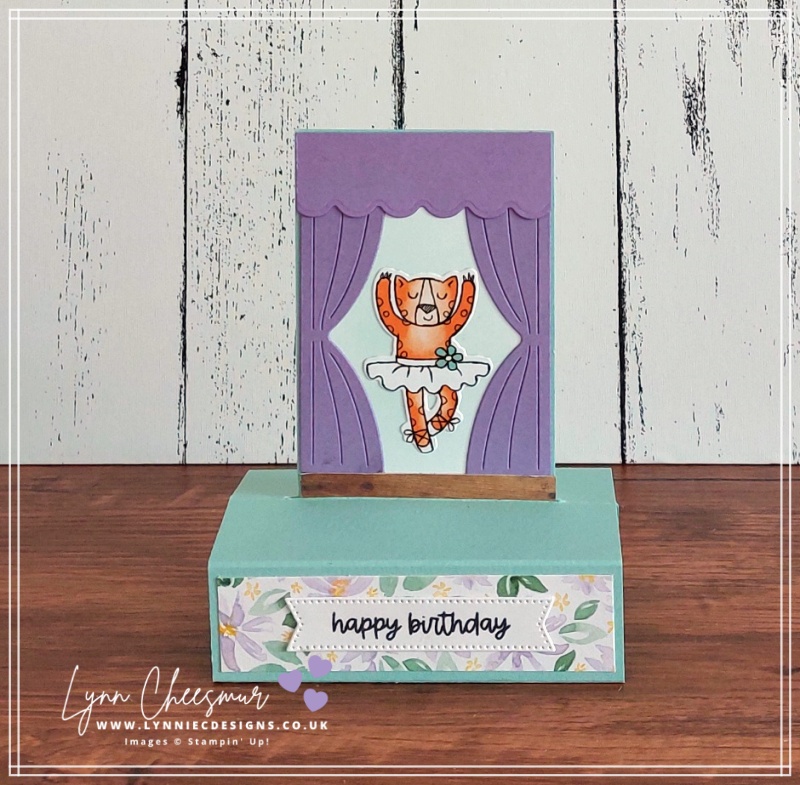
In the paper pack there are two 12″ x 12″ sheets of six double sided designs. One side has cute characters on and the other black & white designs. For the card above I cute out a ballet dancing tiger and made a stage for her with some of the dies from the Zany Zoo bundle. The sentiment for all of my examples is from a favourite stamp sets Best Family Ever.
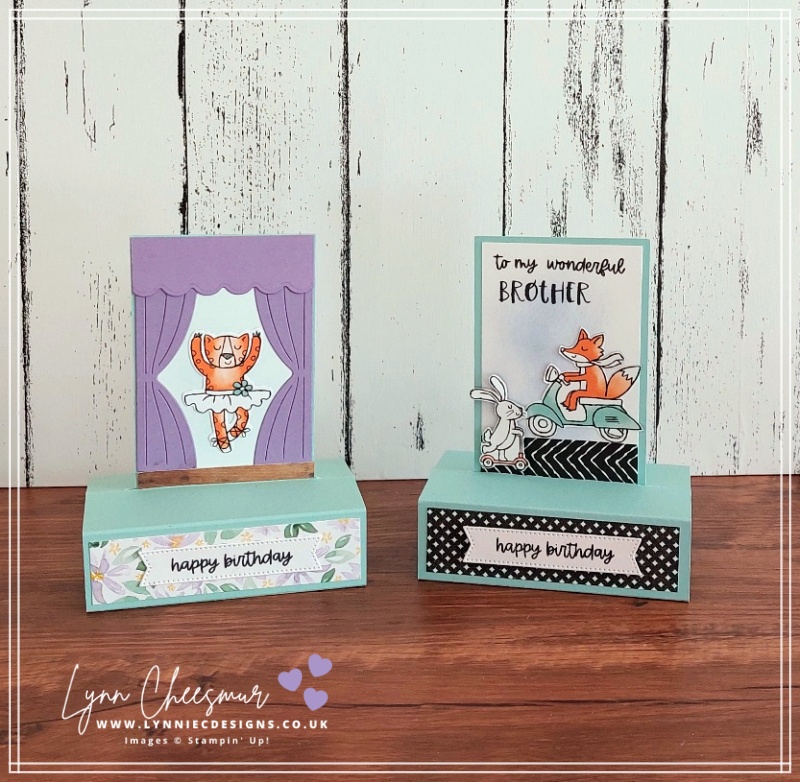
In fact the first pop up card I made was for my brother and this stamp set was perfect to personalise his birthday card. On all the cards I cute the sentiment label using one of the Stylish Shapes dies.
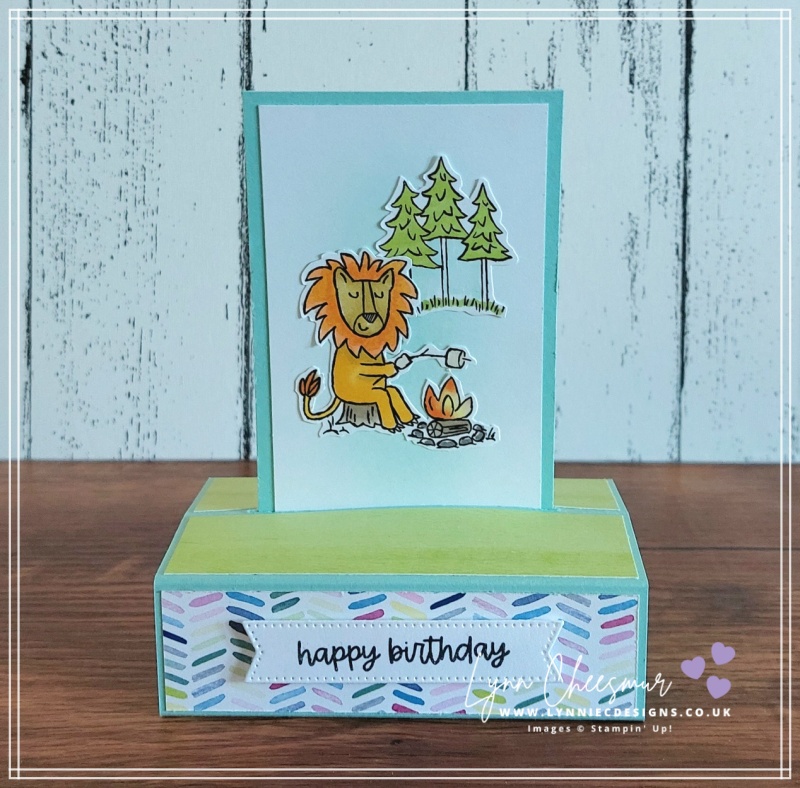
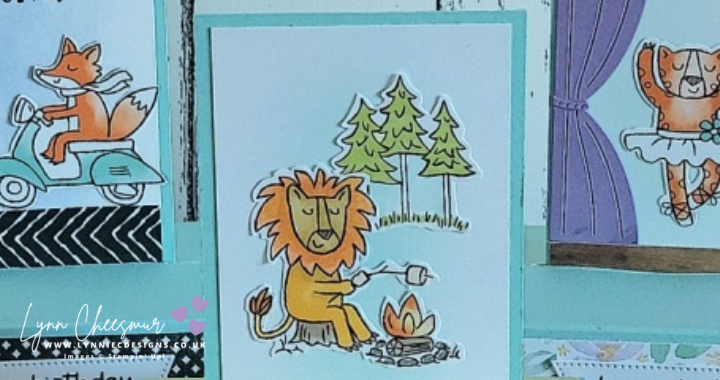
In the video, which you can watch below, I make this pop up birthday card featuring the lion roasting marshmallows over a fire ….. so cute! The paper I used to cover the front and top of this card stand (if that’s the right thing to call it) is cut from the Bright & Beautiful 6″ x 6″ designer series paper pack.
All three pop up birthday card examples
I have a tip for the pop up part is to be careful if you are adding elements with dimensionals as that stops the card from folding up one way but it will still fit into a C5 envelope.
Instructions to make these simple pop up birthday cards
- Cut card measuring 4⅛” x 10″ and score on the long side @ 1¼”, 2½”, 3¾”, 5″, 6¼”, 7½” and 8¾”
- Cut middle score line from ⅝” to 3½”
- Cut same or co-ordinating card 2¾” x 5¼” and basic white 2½” x 4½” (x2) for the pop up panel and decorate as required
- Best to watch the video to see how it’s put together
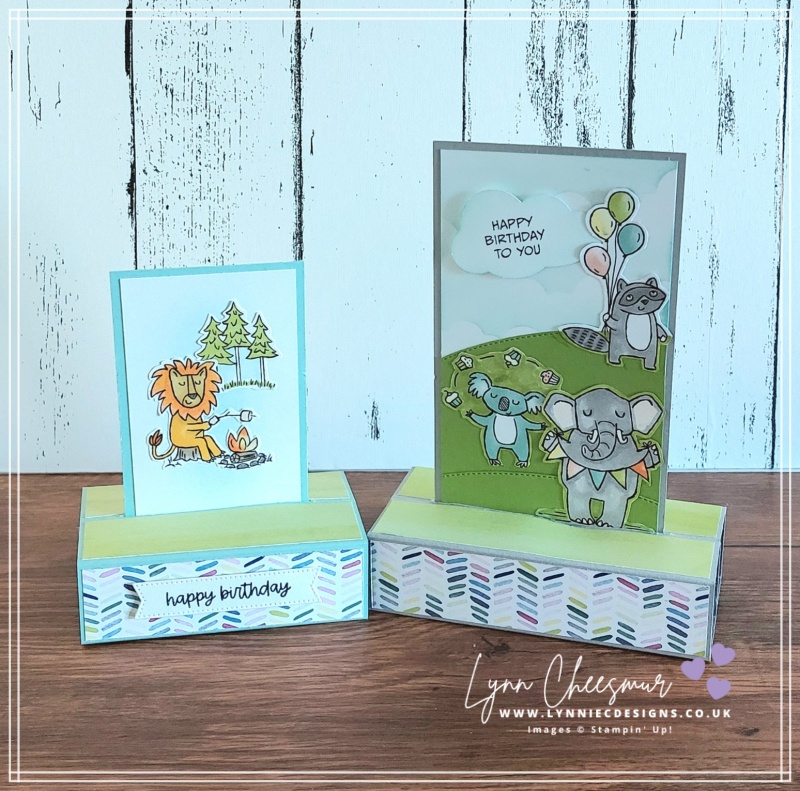
Whenever I find a pop up card idea or fancy fold that I like, I often try to scale it up or down. You can see from the card above that I made a larger version – this one fits into a 5″ x 7″ envelope. The grassy banks and clouds were created with two of the Basic Border dies from the Stampin’ Up! Annual Catalogue.
If you don’t have a demonstrator, live in the UK, and would like to buy any of the products I’ve used you can simply click on the photo’s below to go to that item in my Stampin’ Up! online shop. If you would like more information about shopping with me click this link.
That’s all from me today, as always thanks for stopping by and remember to keep it crafty.

Product List
")

 Designer Series Paper")


 Designer Series Paper")


