Happy Sunday!
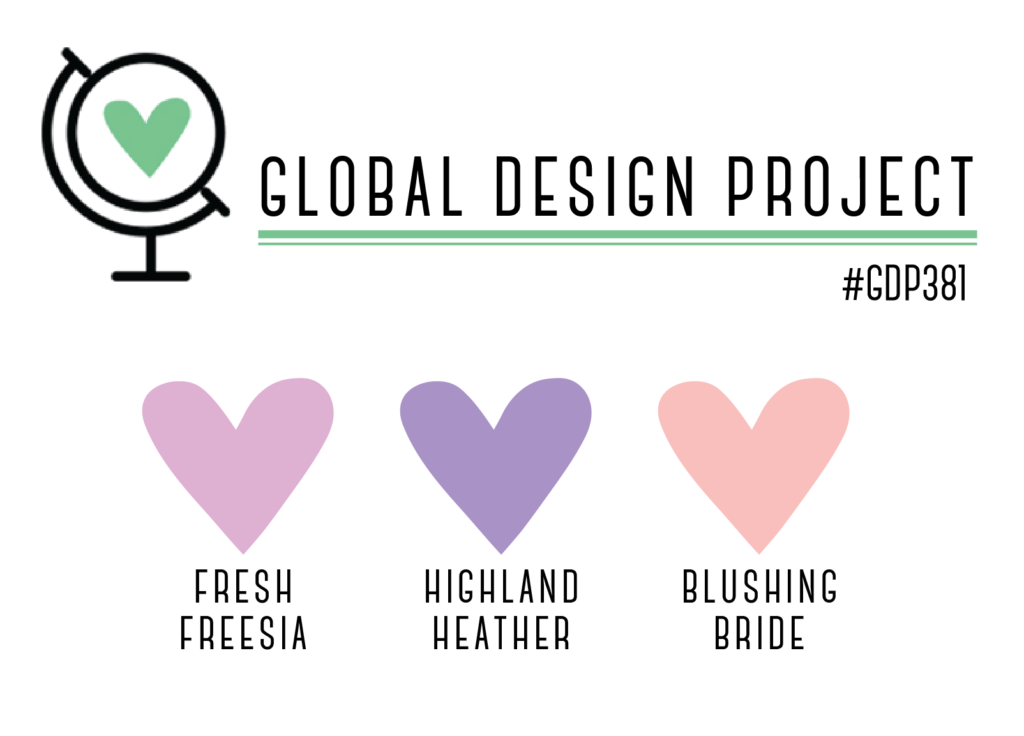
Today I want to show you how to make a cute Flower Pot Card. I loved the design so much that I entered the card in the latest Global Design Project colour challenge #GDP381. The colour combination is Fresh Freesia, Highland Heather and Blushing Bride and I had a lot of fun making this flower pot card. There is loads of inspiration from the Design Team over on their blog and some amazing entries so go check them out by clicking the link above.
For my Flower Pot card, I used the Pansy Patch bundle from the Stampin’ Up! Annual Catalogue along with one of the lovely Artisitic dies, Gingham embossing Folder and Gilded Leafing. Stamping flowers in each of the colours and arranging them in a free standing flower pot.
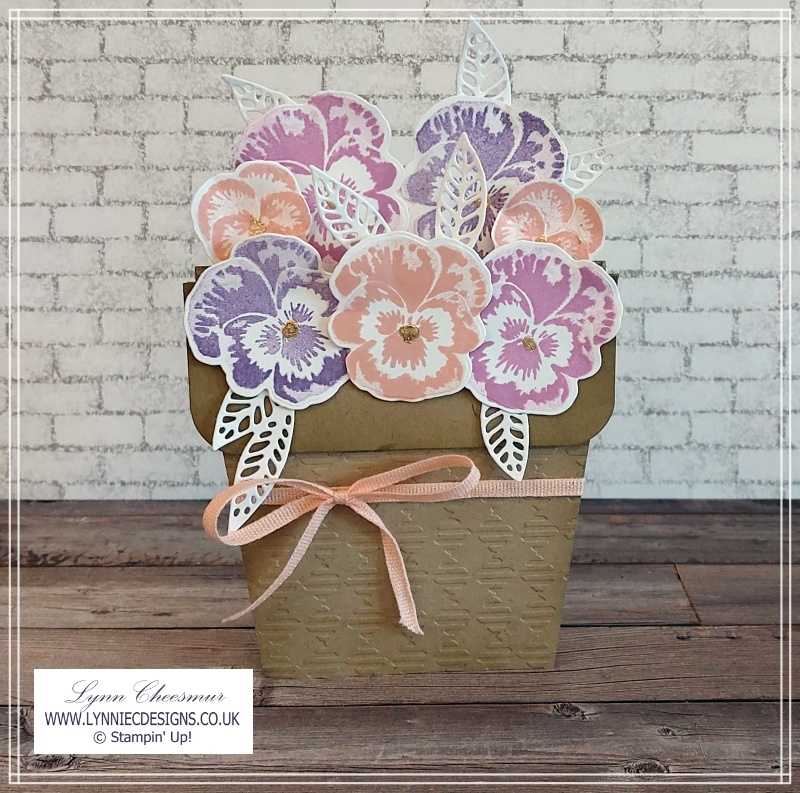
To add a bit of shading on the pot, I embossed it with the Gingham embossing folder and added tone on tone ink to the edges of the pot. The ribbon is from my stash and has retired but was blushing bride. The back row of flowers lift up to reveal a message, although I’ve left mine without a sentiment. I think it would be a great card for a birthday, get well or any occasion. I’m probably going to give it to my Mum next month on Mother’s Day. She is my biggest fan and loves to receive one of my handmade creations, which warms my heart.
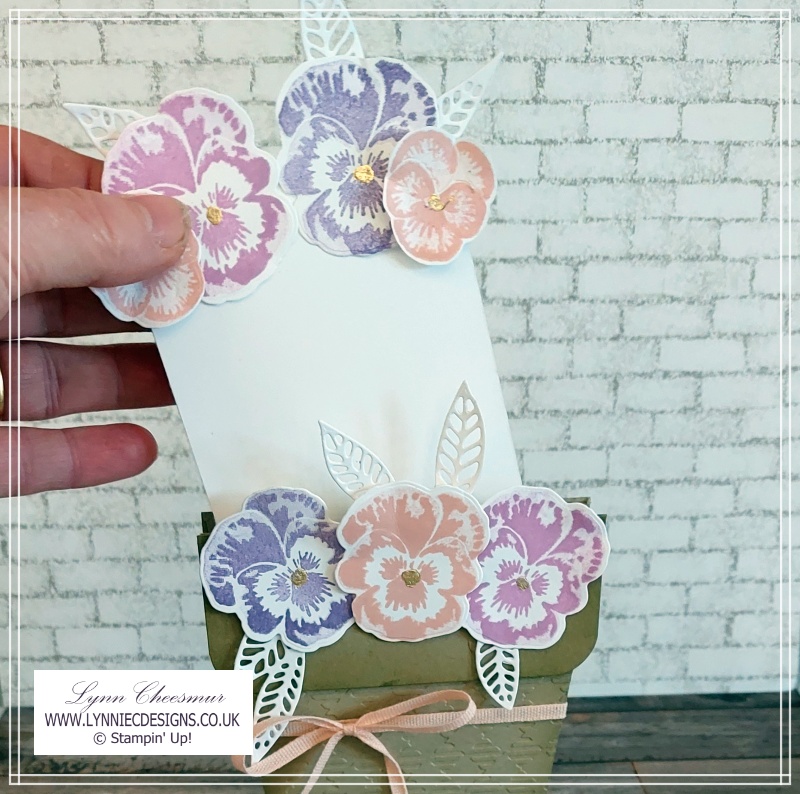
For a touch of glamour I added some Gilded Leafing to the centre of each flower and die cut the large intricate leaf from the Artistic dies and snipped it apart rather than using the leaves in the Pansy dies.
Supplies you need to make this flower pot card
Stamps/Bundles:
Pansy Patch Bundle
Cardstock/Designer Series Paper:
- Crumb Cake
- 10.5 x 10.5cm (x2)
- 4.5 x 10.5cm (x2)
- 4 x 9.5cm (x2) scored @ 1, 2 & 3cm
- Basic White
- 8 x 11.5cm
- Half Sheet for stamping and die cutting
Inks:
Blushing Bride, Fresh Freesia, Gorgeous Grape & Crumb Cake
Accessories:
Gingham Embossing Folder, Gilded Leafing, Blending Brush and Petal Pink ribbon (retired)
Tools and Adhesives:
Artistic Dies, Multipurpose Liquid Glue, Mini Stampin’ Dimensionals, Mini Glue Dots
A bundle like Pansy Patch can (even for me) seem intimidating as it has so many pieces – 23 stamps and 21 dies. But honestly once you start playing with it, you’ll have so much fun you won’t want to stop.
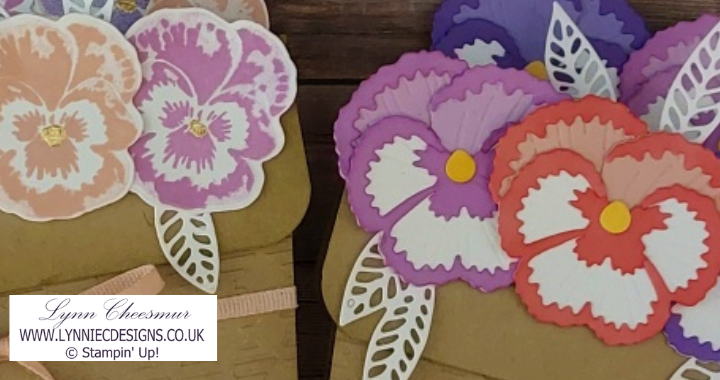
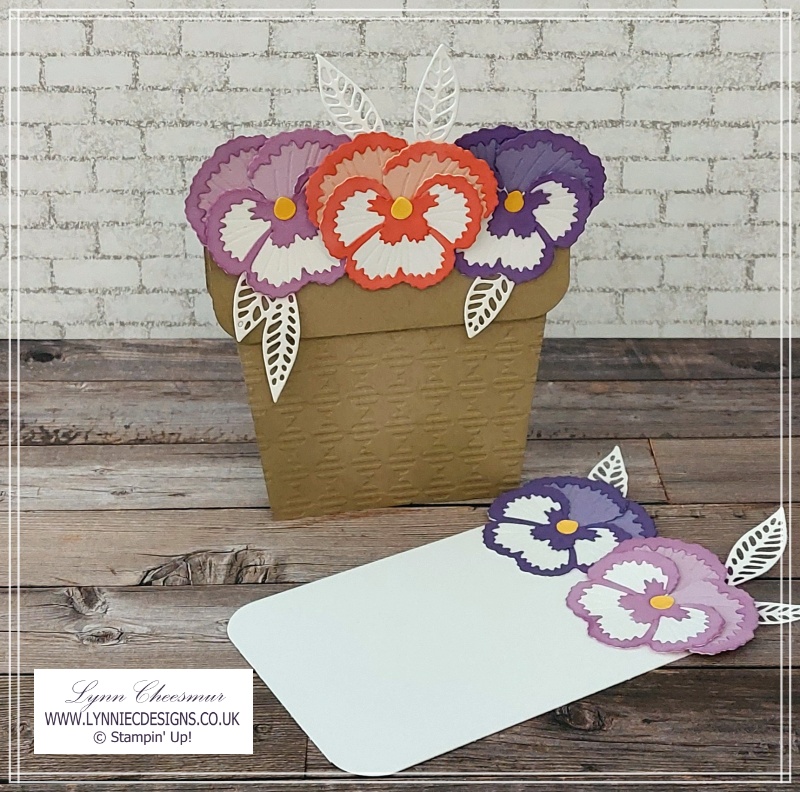
I made another card during a YouTube Live (talk about stepping out of my comfort zone) and instead of stamping and die cutting the pansies I used the dies to make the flowers.

Don’t these cards look great together. If you would like to watch me make the second card you can click the link below:-
https://youtube.com/live/3TXnhc9r-Rk
If you are interested in purchasing any of the current products used simply click on the photo’s below to go to that item in my Stampin’ Up! online shop. If you would like more information about shopping with me click this link.
That’s all from me today, as always thanks for stopping by and remember to keep it crafty.

Product List
")


What pattern did you use for the pot?
Hi Debbie, sorry I’m not sure what you’re asking? I used the Gingham embossing folder to get the pattern on the pot. The video shows you how I cut the cardstock to make the pot shape. Hope that helps!