Happy Sunday!
Today I want to show you how I used lots of gold embossing to make an uplifting card for a Sparkle & Shine Theme Challenge. The card below was made for the October #StampingCoveChallenge but I was late posting it so I’m not sure it was even shared by Emma in her Facebook group.
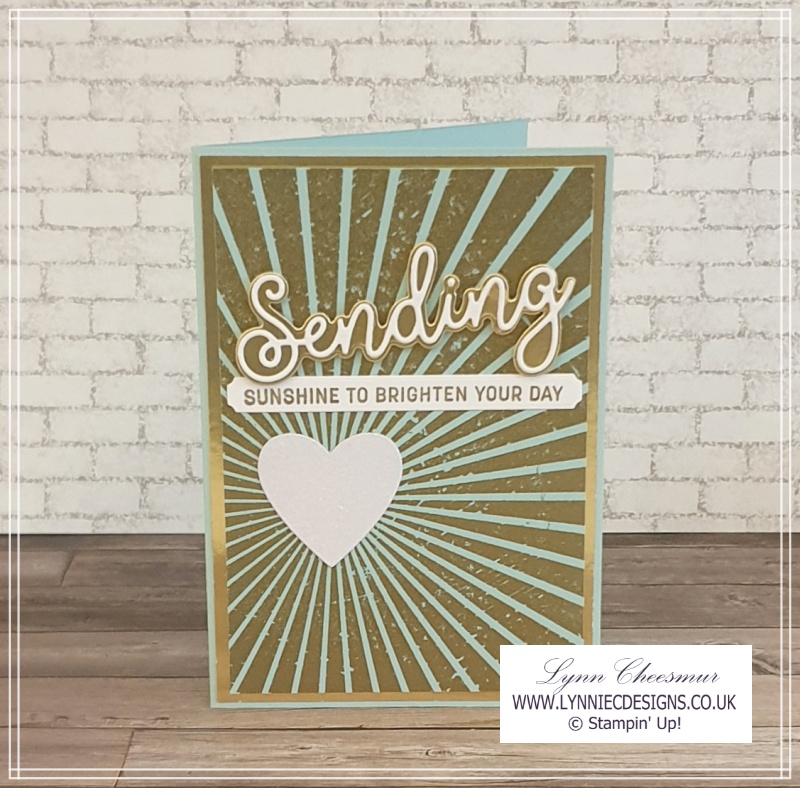
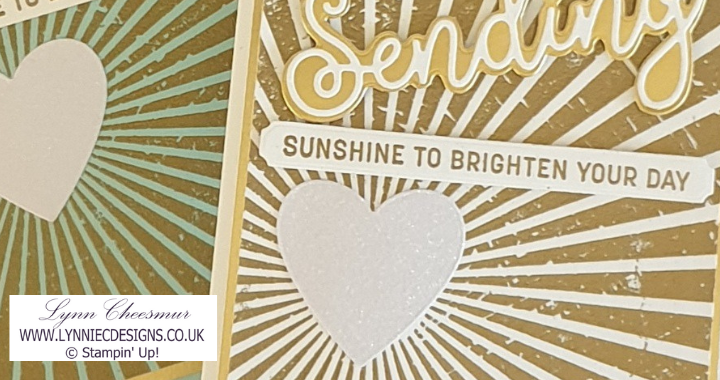
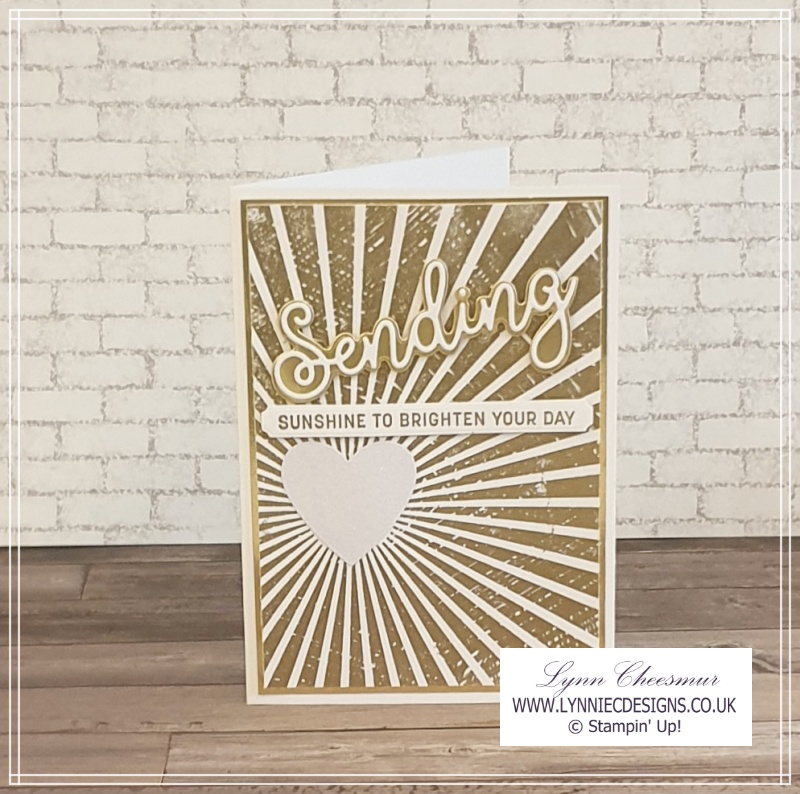
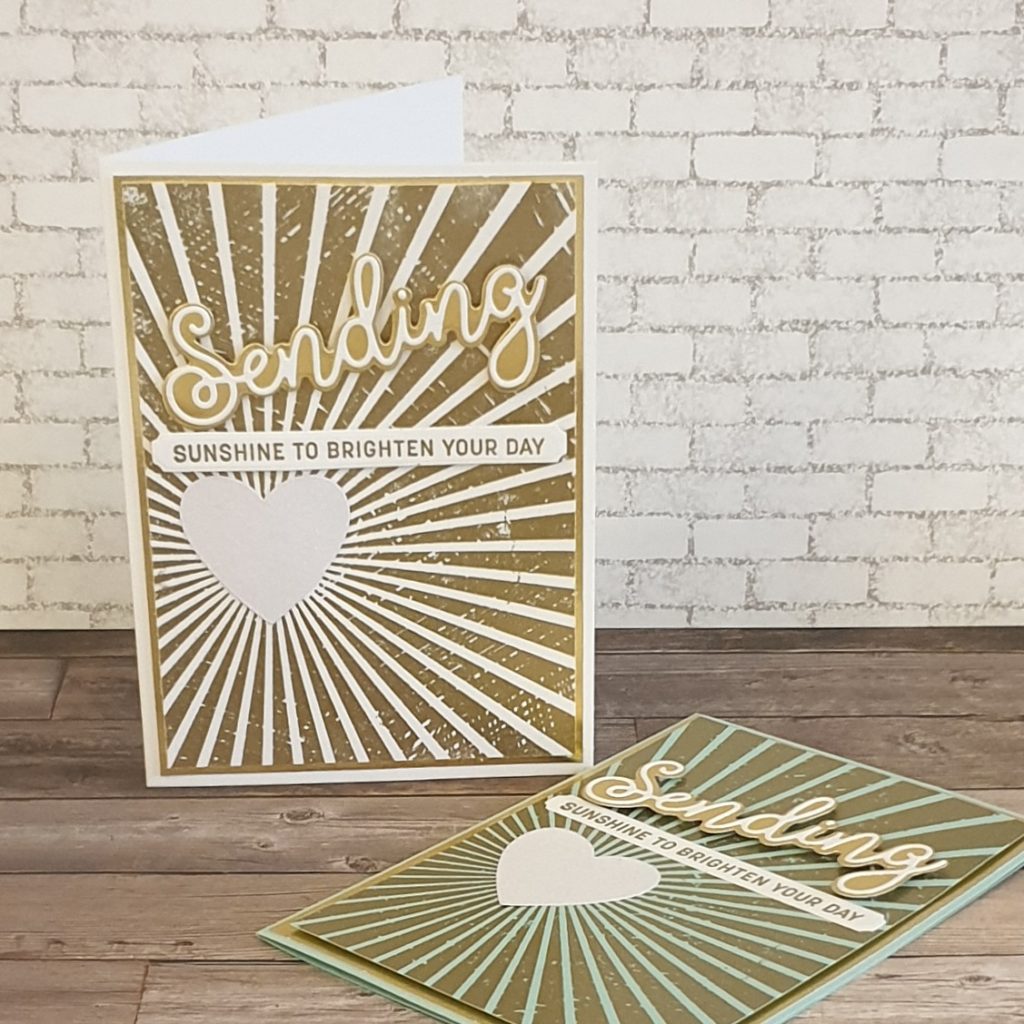
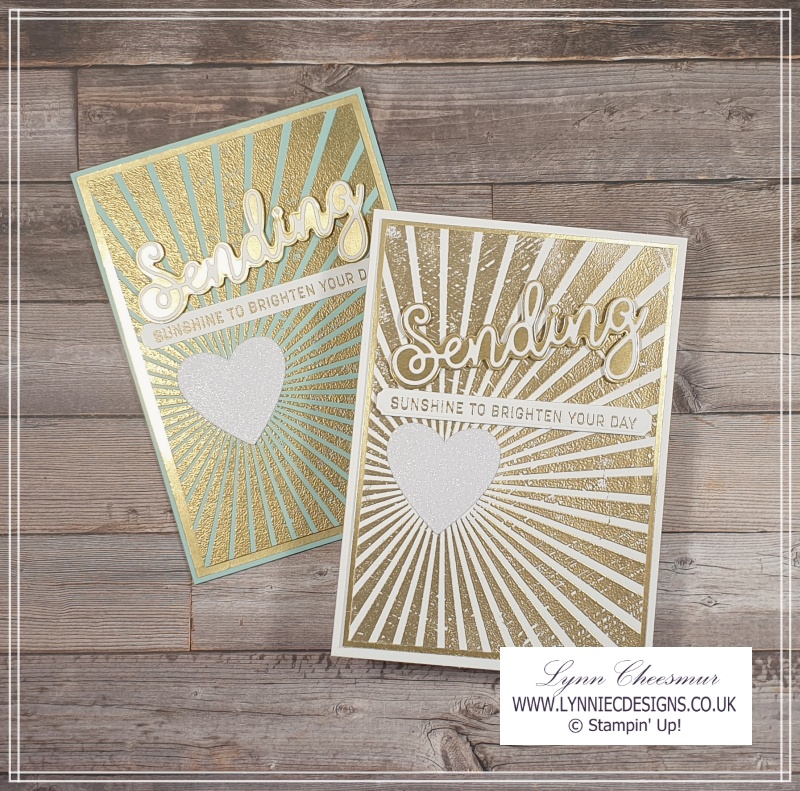
The options with a theme challenge are endless and this Sparkle & Shine theme had me reaching for my gold embossing powder, the Rays of Light background stamp and Sending Smiles bundle by Stampin’ Up! I started by heat embossing the background in gold on a piece of Pool Party. Using the Stamparatus with a big background stamp like this usually helps make sure you get a good image but if you watch the video below you will see that on this occasion it didn’t quite go to plan (at first!).
This was added to a layer of gold foil from which I die cut the sentiment background. Next I die cut Sending in basic white with adhesive sheet on the back. These sheets are great iwth intricate dies as they effectively turn them into stickers and so you can avoid getting into a sticky mess with wet glue. Ask me how I know! The other sentiment was also heat embossed in gold and die cut with a lovely label die in the Sending die set. To add extra sparkle I used a white glimmer paper heart – the photo really doesn’t really do it justice! How I used the heart die from the Give it a Whirl dies but would you can use whatever you have.
Gold Heat Embossing
One of my favourite techniques is heat embossing. The way the emboss powder melts and turns glossy when its heated is just magical and is something that I never tire of. Metallics especially gold embossing really do add a touch of sparkle & shine to projects.
Although I like the first card I made, I wanted to see how it would look on white card. You can see both cards together and if I’m honest I think I prefer the white one. If you click on the photo above you can watch my video on YouTube when I make it. I really must get better at taking photo’s of my projects though because in real life they really do sparkle but look quite flat here!
Supplies to make these cards with gold embossing
Stamps / Bundle:
Sending Smiles Bundle and Rays of Light
Cardstock:
- Pool Party or Thick Basic White 14.8cm x 21cm scored @ 10.5cm
- Pool Party or Basic White 9.5cm x 13.8cm
- Gold Foil 9.9cm x 14.2cm
- Quarter sheet of Basic White for stamping and die cutting
- White Glimmer Paper from 6″ x 6″
Inks:
Versamark and refill
Tools and Adhesives:
Gold emboss powder, Heat Tool, Adhesive Sheets, Multipurpose Liquid Glue, Stampin’ Dimensionals
Do you have a favourite? Let me know in the commnts. You can see how I made the larger version by clicking on the video below.
I have listed the all the products used below so if you would like to purchase any just click on the photo and it will take you to my Stampin’ Up! online shop. If you are unsure about shopping with me click this link to learn just how easy it is.
I’m off to Vienna on Tuesday with some of my team to attend our Stampin’ Up! annual convension. This is the first time I’ve been able to go to one of the live events so I’m hoping to meet Shelli Gardner, who was one of the ladies that started Stampin’ Up! and her lovely daughter Sara who is the current CEO. I’m so excited!!
That’s it for me today, as always thanks for stopping by and remember to keep it crafty.
Product List
")


 Glimmer Paper")


