Happy Sunday!
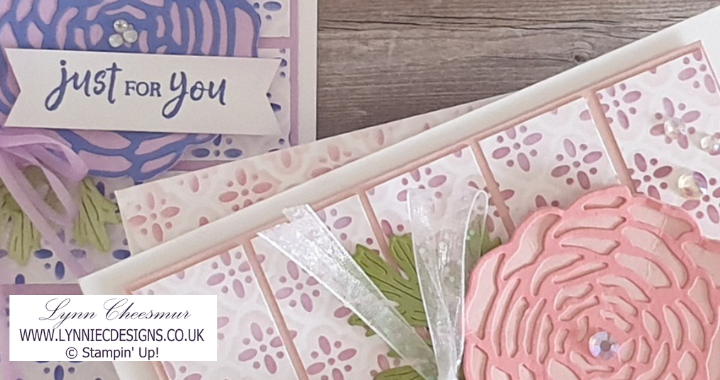
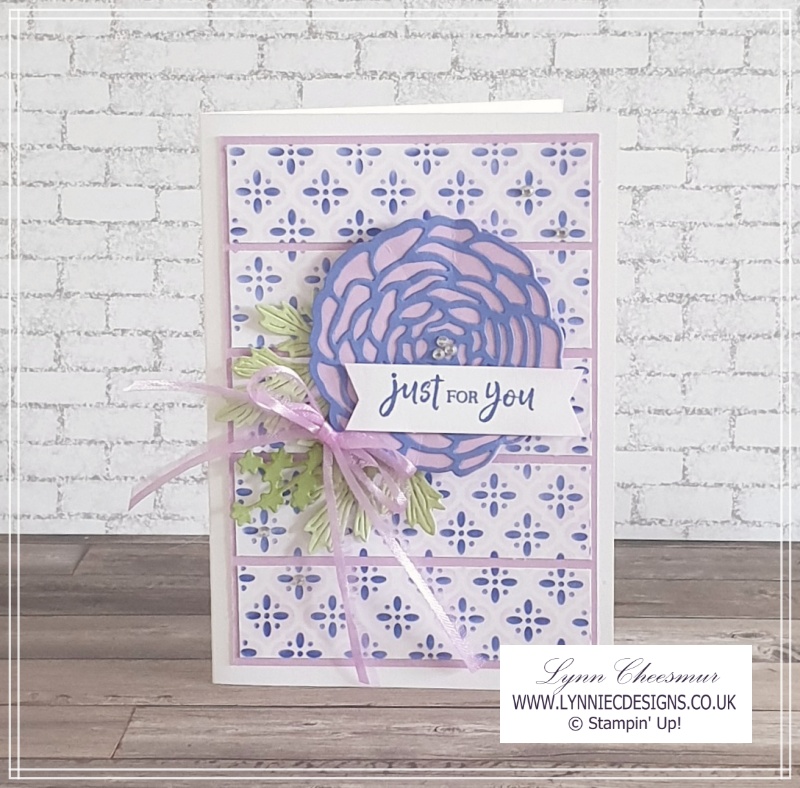
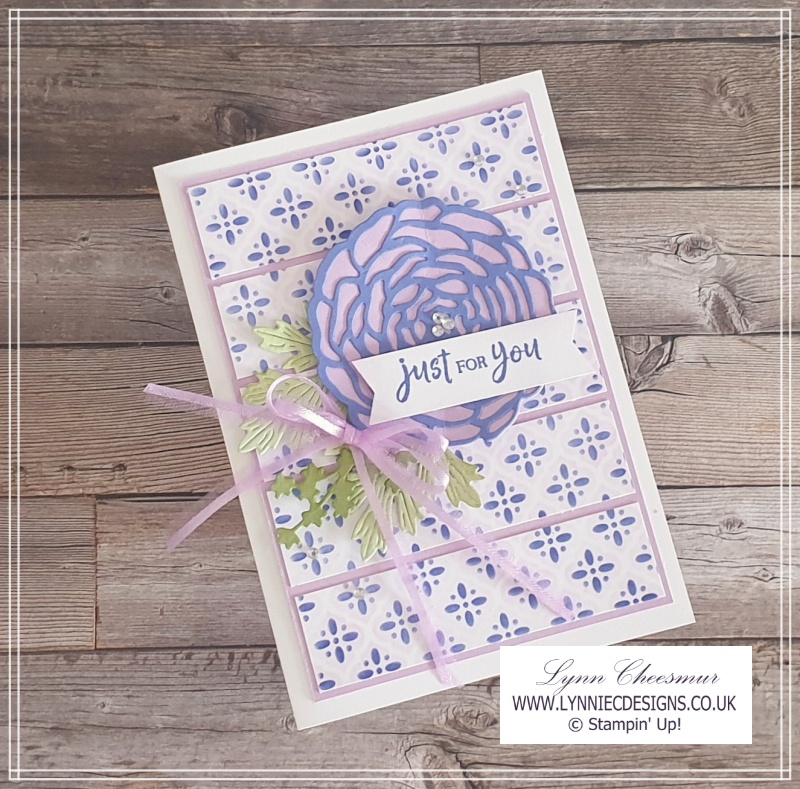
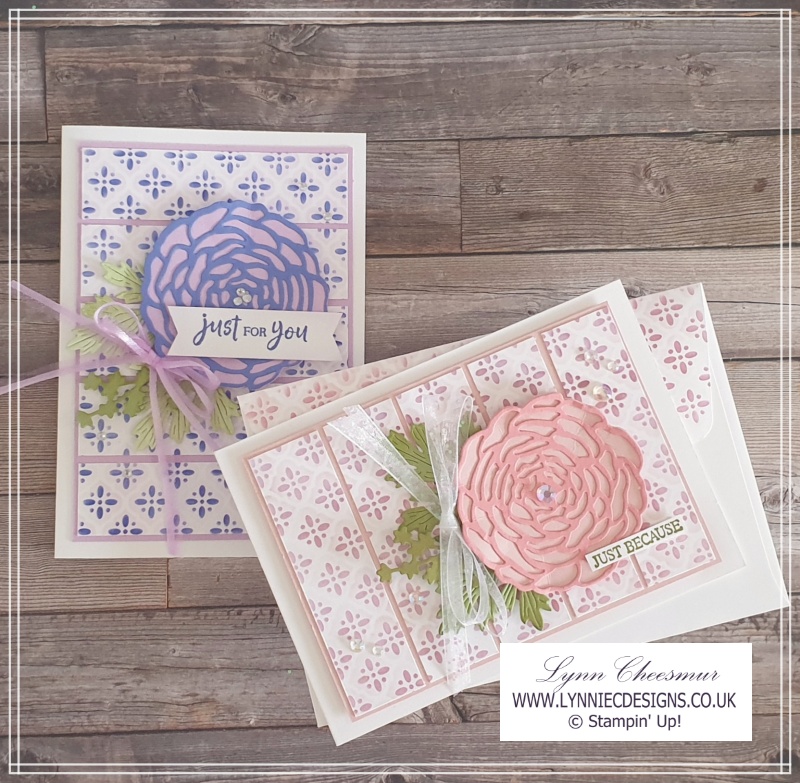
Today I’m sharing a card that I made for The Stamping Cove September sketch challenge. So for this sketch challenge I used the Artistic Mix Decorative Masks and Ranunculus Romance stamp set and co-ordinating dies by Stampin’ Up!. These products go so well together and the colours I chose are Fresh Freesia, Orchid Oasis, Pear Pizzazz and Soft Sea Foam.
How to use a sketch
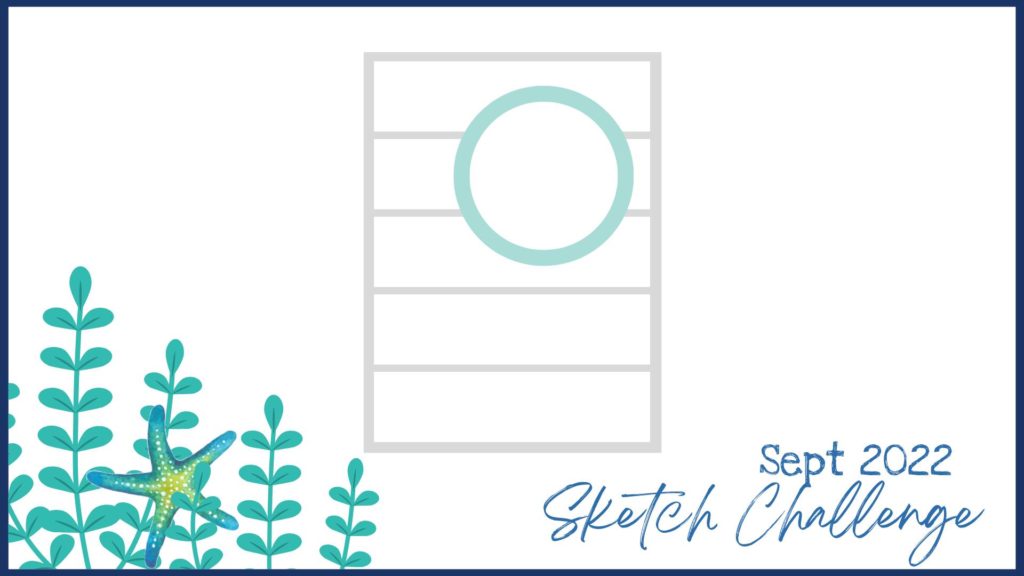
Sketches can be a great starting point when making cards as you get to choose what stamps, papers and colours to use and interpret the design however you want. This is the sketch we were given.
Using Decorative Masks
If you have visited my blog before you know I’m a huge fan of decorative masks (also known as stencils) in my card making. Using decorative masks to create a background is a great alternative option instead of patterned paper. I chose two masks the layer from the Artistic Mix and applied ink with blending brushes before cutting the piece into five panels. If you would like to see another card that I made recently with one of these masks you can click here.
You can watch me make the second version in the video tutorial later in this post or by clicking the photo below. It is the same sketch just turned on it’s side so it looks a little different. The colour palette this time is softer with Blushing Bride and Flirty Flamingo for the flower and Pear Pizzazz and Old Olive for the leaves. I even remembered to make a matching envelope this time.

For both cards I wanted to add ribbon and trimmed the ribbon in half before tying the double bows.
Supplies to make the second card
Stamps / Bundle:
Ranunculus Romance Bundle
Cardstock:
- Thick Basic White 10.5cm x 29.6cm scored at 14.8cm
- Blushing Bride 9.5cm x 13.8cm
- Basic White 9.2cm x 12.5cm plus a scrap for sentiment
- Scraps of Blushing Bridge, Flirty Flamingo, Pear Pizzazz and Old Olive for die cutting
Inks:
Blushing Bride, Flirty Flamingo and Old Olive
Tools and Adhesives:
Artistic Mix Decoratives Masks, Blending Brushes, Glittered Organdy Ribbon, Iridescent Rhinestones, Multipurpose Liquid Glue, Stampin’ Dimensionals, Mini Glue dots
Instructions :
- Cut and score the card base
- First die cut the flower pieces and foliage
- Next use the decorative masks on the piece of basic white and cut into five equal pieces (mine were 2.5cm or 1″ wide)
- Add panels with glue to the coloured panel before adding to base with dimensionals
- Next assemble flower and add with dimensionals
- Apply ink to foliage then tuck under flower
- Then trim ribbon in half, tie a double bow and add with a mini glue dot
- Finally add lots of sparkle with iridencent rhinestones
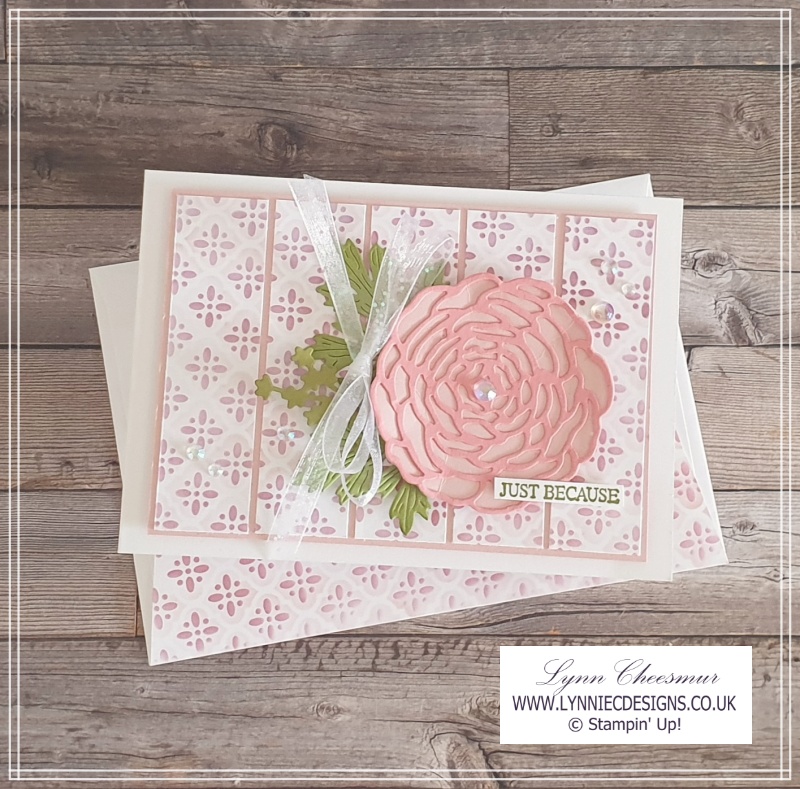
Making a matching envelope is a really fun thing to do because it brings a little something special and gives you a hint at what is inside. You can see how I did this if you click on the video below.
That’s it for me today, as always thanks for stopping by and remember to keep it crafty.

Product List
")


 Glittered Organdy Ribbon")


