
Happy Sunday!
Today I’m playing along with the Global Design Project challenge and will be showing you how to make some clean and simple Christmas cards. This week’s challenge is a CASE the Designer and we are casing this lovely card from Wilma De Korte from the Netherlands.
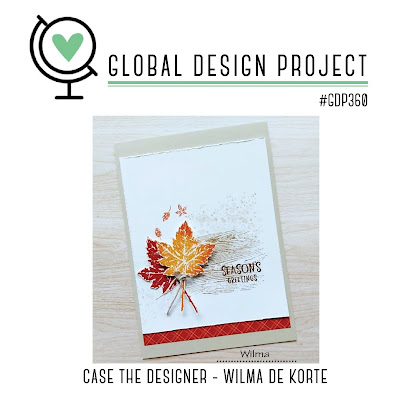
You can find lots of inspiration from the talented Design Team and all the other entries for #GDP360 on their website HERE.
CASE = Copy And Selectively Edit
When you CASE a project you take what you like from a design and make it your own. It might be the stamp set – the colors, the layout, the theme, the images – whatever has inspired you to make a card of your own.
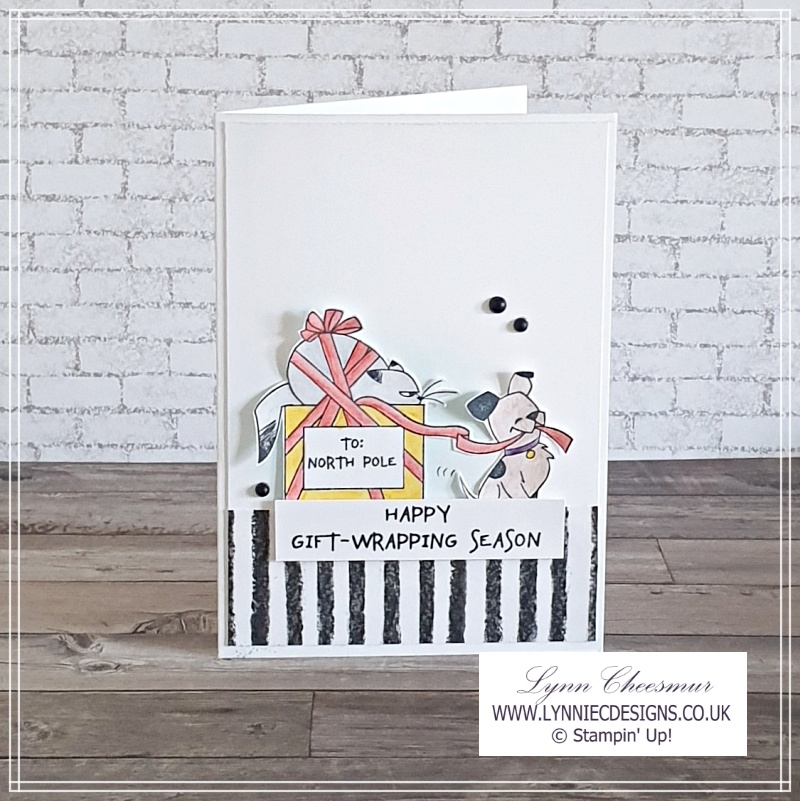
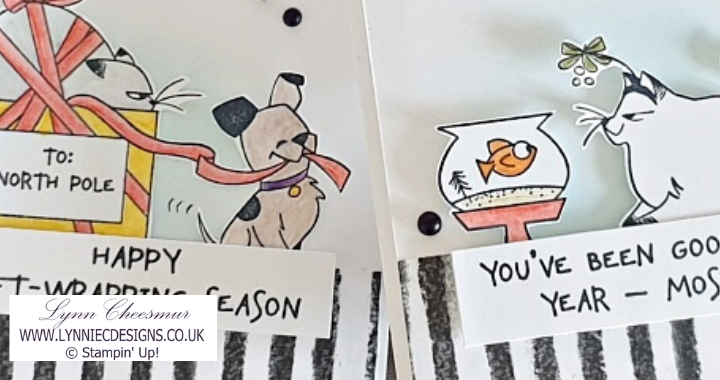
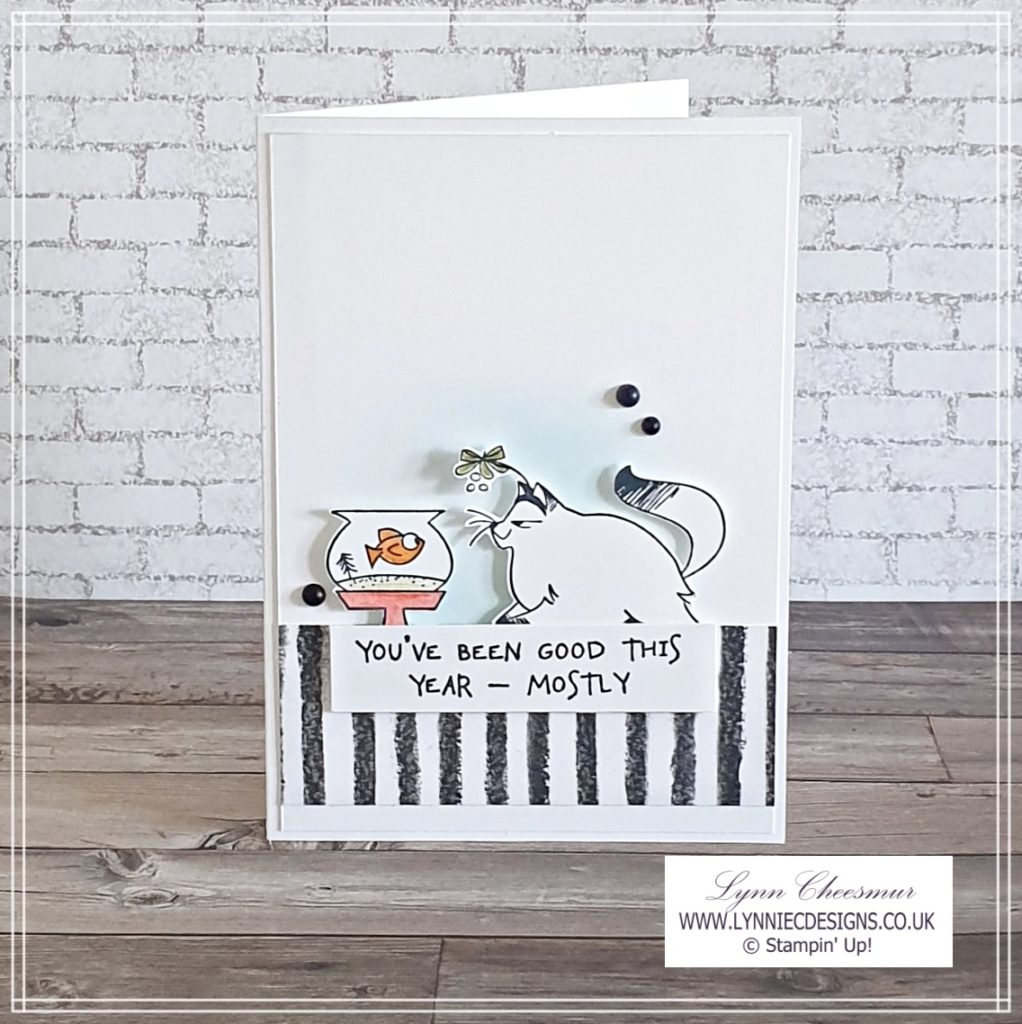
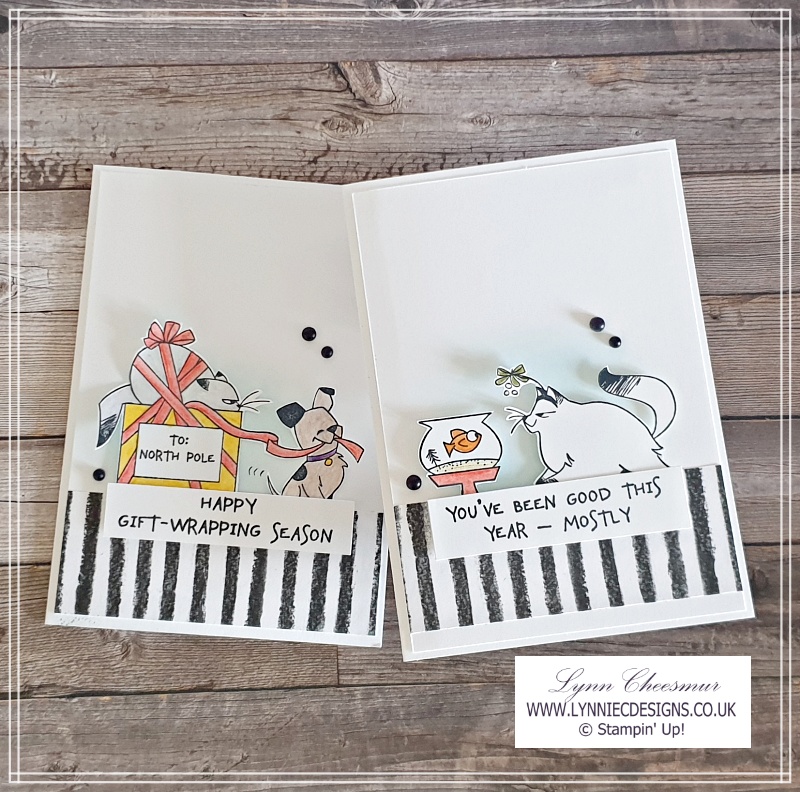
I used a similar layout from the original card but instead of an autumnal theme made clean and simple Christmas cards. The fun images are from the North Pole Mischief stamp set in the Stampin’ Up! Jul – Dec 2022 mini catalogue. For the strip of patterned paper I added a slightly larger piece of the Perfectly Pencilled designer series paper. I love black and white paper it’s so clean and simple and like a little black dress goes with anything!
If you click on the image below you can see me create the second version of these clean and simple Christmas cards. Both stamped images are such fun aren’t they!
Supplies to make these clean and simple Christmas cards
Stamps:
North Pole Mischief and Christmas to Remember
Cardstock:
- Thick Basic White 21cm x 14.8cm scored at 10.5cm
- Basic White 10cm x 14.3cm plus a quarter sheet for die cutting and stamping
- Perfectly Penciled 12″ x 12″ dsp 3.8cm x 10cm
- Night of Navy 1cm x 10.5cm (x2)
Inks:
Memento Black and Balmy Blue
Tools and Adhesives:
Watercolour Pencils, Blending Brush, Matte Black Dots, Wink of Stella, Multipurpose Liquid Glue, Stampin’ Dimensionals
Instructions :
- Cut and score card base
- Add Balmy Blue ink with a blending brush on basic white layer
- Trim dsp and add to layer
- Stamp image and sentiment on scrap piece
- Colour with watercolor pencils and fussy cutting
- Add fussy cut images with dimensionals
- Finally add matte black dots to add a bit of sparkle
These cards were such fun to make and could easily be made on mass. They were one of the projects we made in my monthly card class. If you wanted to keep them really simple you could even stamp directly on the layer and avoid all that fussy cutting but I don’t mind doing that these days.
Thank you for visiting my blog today, I hope you like these cards as much as I do. They were a lot of fun to make and quick too so are great for making multiples. I would love to know what you think so leave me a comment. As usual I’ve listed all the current products I used below. If you click on the images you will go directly to that item in my Stampin’ Up! on line store. Click here if you would like to read about how easy it is to shop with me 24/7.
Remember if you don’t have a demonstrator, I would be happy to send you a catalogue and can add you to my mailing list or answer any questions you may have.
As always, thanks for stopping by and remember to keep it crafty.

Product List
")
")
 Designer Series Paper")


