

Hello, my crafty friends! 👋
Hello and welcome to this month’s Be Inspired Blog Hop! Our theme is Feeling Festive, and I’m so glad you’re here. I’ve been having such a lovely time diving into my Christmas crafting lately, and for this hop I ended up creating not one but two elegant 6″ × 6″ cards — because after making the first one, I wanted to try a different colour combination!

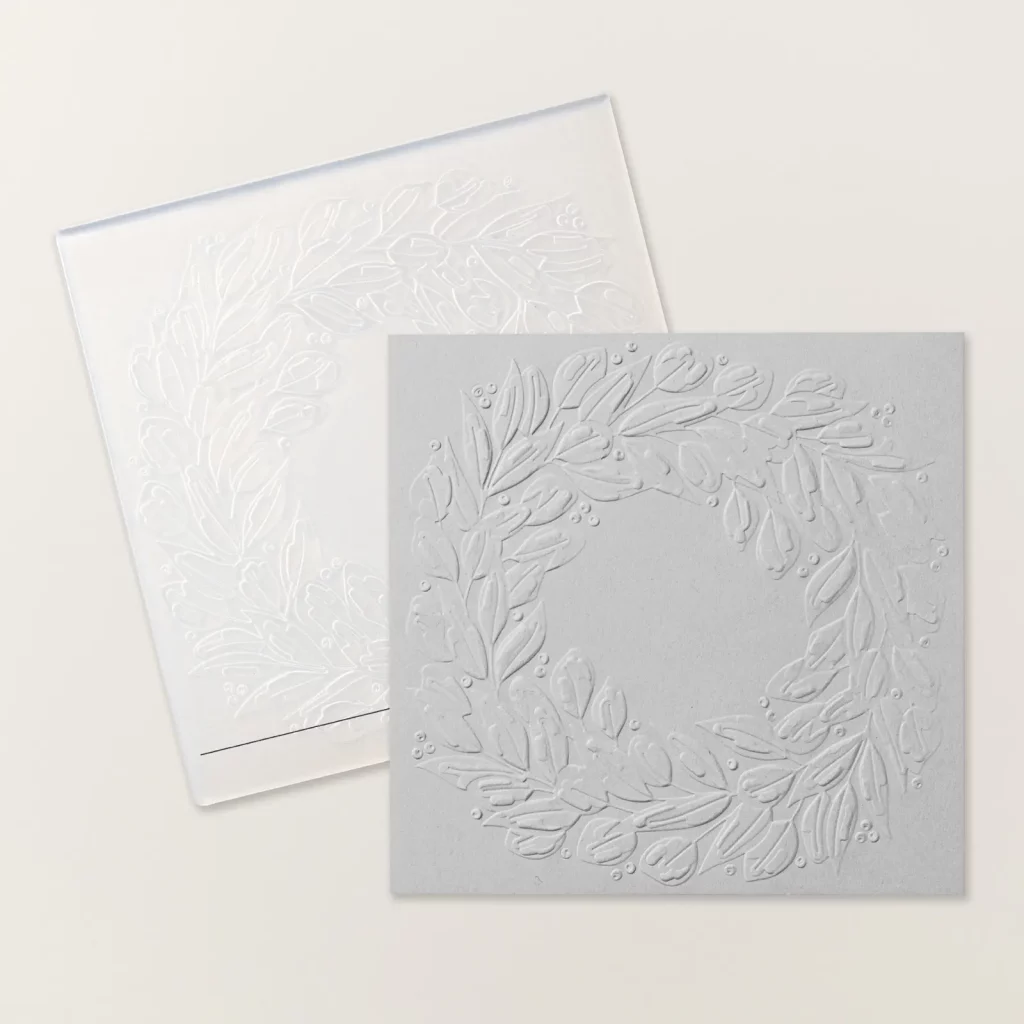
Stampin’ Up! have so many gorgeous festive products, but the Traditional Wreath 3D Embossing Folder won my heart again. There’s something so classic about it, and it makes it incredibly easy to create cards that feel special. Click here to see some other Christmas cards featuring this beautiful embossing folder.
Two Elegant Wreath Cards
Both cards feature the beautiful Traditional Wreath 3D Embossing Folder highlighted with copper embossing powder as well as a large Merry Christmas sentiment — I honestly love how warm and rich the embossing powder looks against both colour palettes. I also added touches of red using Pearlized Enamel Effects (sadly retired) and finished each design with Traditional Sparkling Sequins for a little bit of sparkle and a bow.

So let me tell you about each card …
Card 1:
This one feels fresh and crisp — very classic Christmas with a modern twist. I started with a white card base, then added navy and white layers to create that clean, elegant contrast. The embossed wreath really stands out and the copper embossing adds such a lovely glow. A few red enamel dots and sequins bring the whole card to life without overwhelming the design. And of course… a pretty double bow to finish it off!

Card 2:
The second card has a softer, more vintage feel. I used a Very Vanilla card base with Lost Lagoon and Very Vanilla layers, and the combination is so calming and elegant. Just like the first card, I heat-embossed both the wreath and sentiment in copper, and I love how warm and understated it looks against these colours. The touches of red really add that festive hint without taking over. And yes — this one also has a double bow, because I couldn’t resist!

Which One Is Your Favourite?
I honestly can’t decide — they each have their own charm, and I love how the same embossing folder and sentiment can create two completely different looks just by changing the colours.
Measurements & Instructions
Card Size : 6″ × 6″ finished cards
Measurements
- Thick Basic White or Very Vanilla : 6″ × 12″ (score at 6″)
- Night of Navy or Lost Lagoon: 5 5 ½” × 5 ½”
- Basic White or Very Vanilla (embossed piece): 5 ⅜” × 5 ⅜”
- Night of Navy or Lost Lagoon : 4 ¾” x 3 ½”
- Basic White or Very Vanilla : 4 ½” x 3″
- Basic White of Very Vanilla : 4″ x 6″ (for sentiment and die-cut foliage
Instructions
- Cut and score your card base.
- Adhere the coloured layer to the card front using multipurpose liquid glue.
- Run the next layer through the Stampin’ Cut & Emboss machine in the Traditional Wreath 3D Embossing Folder.
- Lightly tap Versamark over the raised wreath (or use a brayer if you prefer more control), sprinkle with Copper Embossing Powder, and heat until shiny. Adhere with glue.
- Cut labels and adhere with glue and dimensionals.
- Stamp Merry Christmas in Versamark, heat-emboss with copper and fussy cut. Add with dimensionals.
- Using the Branching Out Dies, cut several pieces of foliage. Tuck and layer them around and under the sentiment for a soft, elegant cluster.
- Place small dots of Pearlized Enamel Effects (red) around the wreath and on some of the die cut pieces and add a few Traditional Sparkling Sequins for shimmer.
- To Finish tie a double bow using your favourite co-ordinating ribbon and attach with glue dots.


I hope these cards inspire you to play around with colour combinations in your own festive crafting. Sometimes all it takes is a different base or layer to give a design a whole new feel.
Thanks so much for hopping with us today! Be sure to continue around the hop for even more festive inspiration — there’s so much creativity to enjoy. Next up is the talented Brian King from the United States.

Happy crafting 💜

Be Inspired Design Team Blog Roll:
- Brian King
- Emma Goddard
- Heather Thomas
- Stesha Bloodhart
- Angela Meiritz-Reid
- Annette Elias
- Andrea Sargent
- Lynn Cheesmur (you are here 💜)
![Traditional Wreath 3 D Embossing Folder [ 165874 ]](https://assets1.tamsnetwork.com/images/EC042017NF/165874s.jpg "Traditional Wreath 3 D Embossing Folder [ 165874 ]")
![Branching Out Dies [ 165775 ]](https://assets1.tamsnetwork.com/images/EC042017NF/165775s.jpg "Branching Out Dies [ 165775 ]")
![Merry Christmas Photopolymer Stamp Set (English) [ 165831 ]](https://assets1.tamsnetwork.com/images/EC042017NF/165831s.jpg "Merry Christmas Photopolymer Stamp Set (English) [ 165831 ]")
![Traditional Sparkling Sequins [ 165875 ]](https://assets1.tamsnetwork.com/images/EC042017NF/165875s.jpg "Traditional Sparkling Sequins [ 165875 ]")
![Versamark Pad [ 102283 ]](https://assets1.tamsnetwork.com/images/EC042017NF/102283s.jpg "Versamark Pad [ 102283 ]")
![Metallics Wow! Embossing Powder [ 165678 ]](https://assets1.tamsnetwork.com/images/EC042017NF/165678s.jpg "Metallics Wow! Embossing Powder [ 165678 ]")
![Heat Tool - Uk Plug [ 129054 ]](https://assets1.tamsnetwork.com/images/EC042017NF/129054s.jpg "Heat Tool - Uk Plug [ 129054 ]")
![Stampin' Cut & Emboss Machine [ 149653 ]](https://assets1.tamsnetwork.com/images/EC042017NF/149653s.jpg "Stampin' Cut & Emboss Machine [ 149653 ]")
![Multipurpose Liquid Glue [ 154974 ]](https://assets1.tamsnetwork.com/images/EC042017NF/154974s.jpg "Multipurpose Liquid Glue [ 154974 ]")
![Stampin' Dimensionals [ 104430 ]](https://assets1.tamsnetwork.com/images/EC042017NF/104430s.jpg "Stampin' Dimensionals [ 104430 ]")
![Mini Glue Dots [ 103683 ]](https://assets1.tamsnetwork.com/images/EC042017NF/103683s.jpg "Mini Glue Dots [ 103683 ]")
I love this technique! The Vanilla one is so warm and welcoming, but I really love the crispness of the white one. Both, though, are gorgeous.
Thank you so much Brian – I made the white one first. To be honest, it was just a great excuse to use the copper embossing powder