

Hello
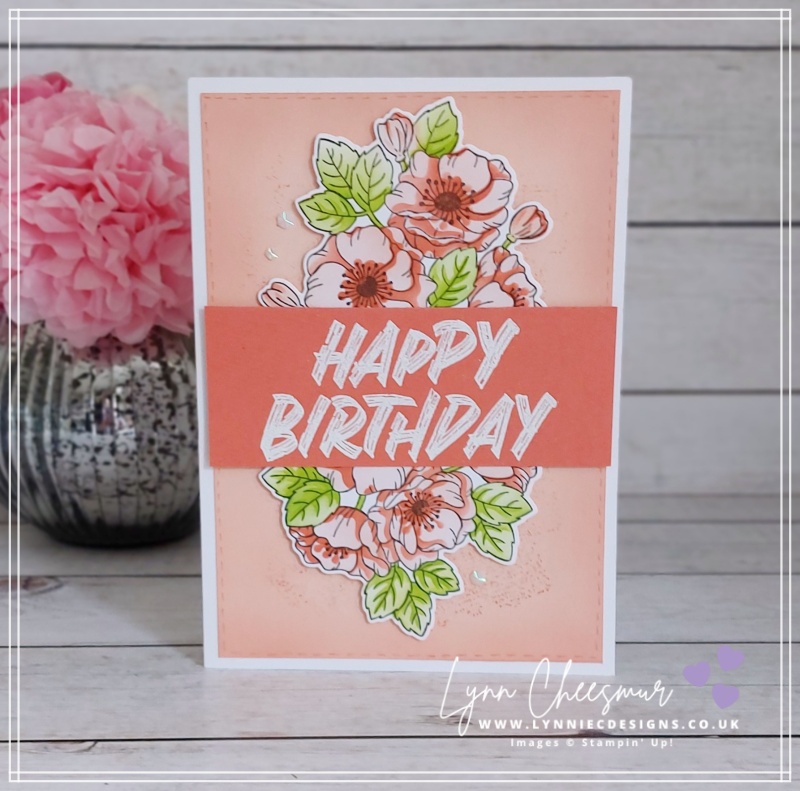
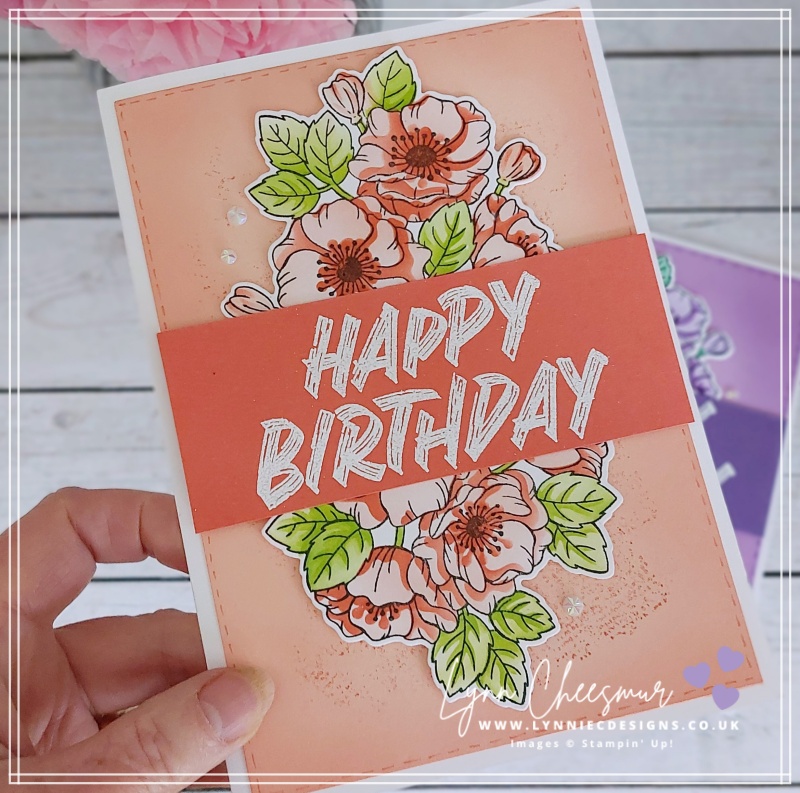
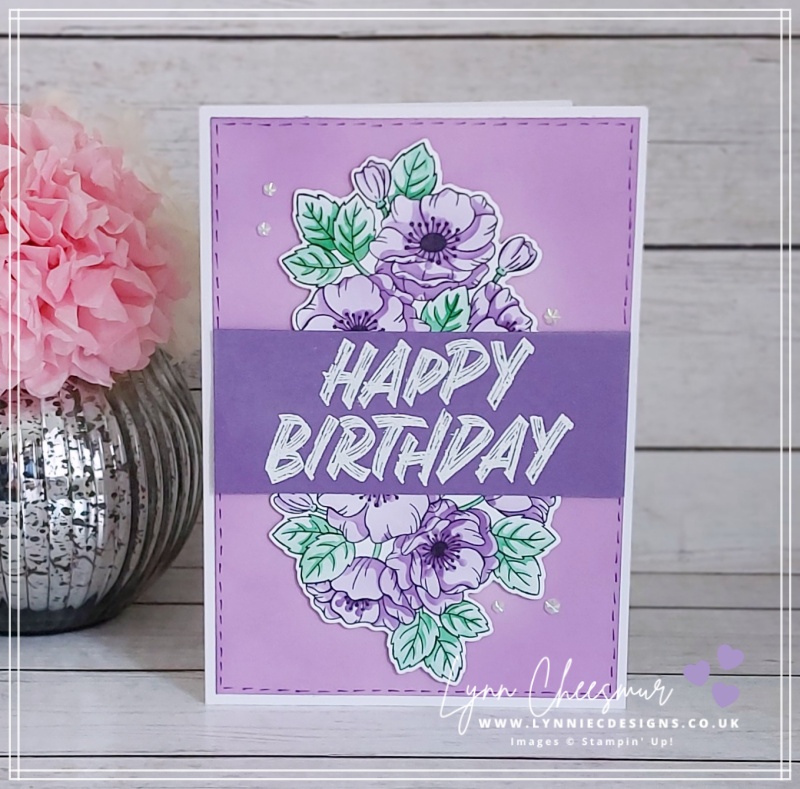
Today, I’m coming on quickly to show you how to make a stamped image look bigger. Now this is a trick I often use when making a larger card where you simply cut your stamped and coloured image in half and tuck each piece under another piece of card. These 5″ x 7″ cards where created with the Enduring Beauty bundle by Stampin’ Up, which includes a stamp set, co-ordinating dies and decorative masks with a sentiment from Layered Thoughts, a stamp set in the upcoming annual catalogue.
Using decorative masks to colour a stamped image
There a lots of ways to add colour to a stamped image and decorative masks are becoming one of my favourites, as they are so quick and easy to use. There are 5 Enduring Beauty Decorative Masks and each mask adds depth and colour to your paper crafting projects, whether you’re making cards, gift tags, or gift packaging. The masks are numbered and I used a permanent marker to make the numbers easier for me to see. Click here to see another card that I made a while ago with another stamp set, co-ordinating dies and decorative masks called Layers of Beauty.
I really enjoy making larger cards and the ladies who come to my card classes do too, so this was one of the projects from my April classes. (The design was totally inspired and CASEd by a swap I received at OnStage Strasbourg from my Stampin’ Sister, Heather Thomas aka The Songbird Stamper which you will see in the video below.)
Making a stamped image look bigger
It is so easy to make a stamped image appear bigger by cutting it into two pieces and hiding the cut by placing them under another piece of card. In this case, as the sentiment is a large one I used a 2″ strip of card to hide the gap between the two floral pieces.
The Enduring Beauty stamps, dies and masks are all now Last Chance Products, which means they are available only while stocks last. I would encourage you to keep a close eye on Last Chance Products as you can often find some proper bargains!
Cardstock:
- Thick Basic White – 10″ x 7″ scored at 5″
- Fresh Freesia – 4¾” x 6¾”
- Gorgeous Grape – 2″ x 6¾”
- Basic White – quarter sheet of A4 for stamping and die-cutting
The ink colours for this first card are petal pink, calypso coral and lemon lime twist and for the second gorgeous grape and shaded spruce.
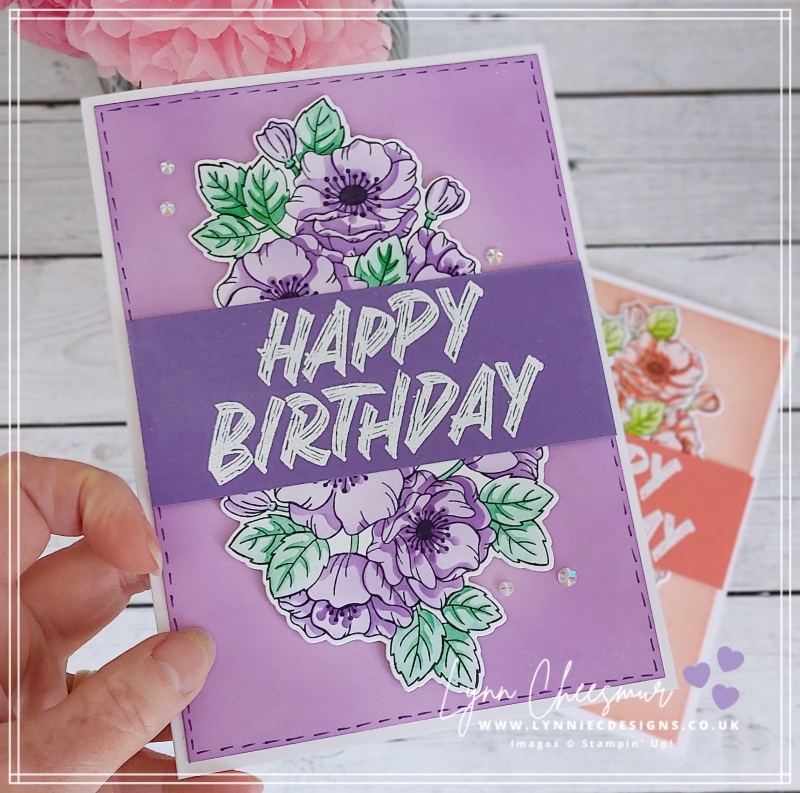
On each version I added extra detail to the colour layer with a blending brush and Stampin’ Write Marker in the same colour as the birthday sentiment strip. And because you always need a bit of sparkle, Iridescent Faceted Gems were added to finish off each card. You can see how easy it was to stretch this pretty floral image by clicking the video below.
All of the current products used are listed below, so click the photos to go to my online shop. If you would like more information about shopping with me click this link. You can also get in touch via email or phone. If you have purchased from me in the past 6 months a new annual catalogue will be winging its way to you soon.
Stampin’ Rewards
As I mentioned in my last post, Stampin’ Up! has launched its new customer rewards programme, Stampin’ Rewards! So you can now earn rewards with purchases of just £20, so get in touch if you would like to learn more.
That’s all from me today, as always, thanks for stopping by and remember to keep it crafty.

![Enduring Beauty Photopolymer Stamp Set (English) [ 162670 ]](https://assets1.tamsnetwork.com/images/EC042017NF/162670s.jpg "Enduring Beauty Photopolymer Stamp Set (English) [ 162670 ]")
![Enduring Beauty Dies [ 162672 ]](https://assets1.tamsnetwork.com/images/EC042017NF/162672s.jpg "Enduring Beauty Dies [ 162672 ]")
![Enduring Beauty Decorative Masks [ 162673 ]](https://assets1.tamsnetwork.com/images/EC042017NF/162673s.jpg "Enduring Beauty Decorative Masks [ 162673 ]")
![Basic White A4 Thick Cardstock [ 159230 ]](https://assets1.tamsnetwork.com/images/EC042017NF/159230s.jpg "Basic White A4 Thick Cardstock [ 159230 ]")
![Fresh Freesia A4 Cardstock [ 155614 ]](https://assets1.tamsnetwork.com/images/EC042017NF/155614s.jpg "Fresh Freesia A4 Cardstock [ 155614 ]")
![Gorgeous Grape A4 Cardstock [ 147011 ]](https://assets1.tamsnetwork.com/images/EC042017NF/147011s.jpg "Gorgeous Grape A4 Cardstock [ 147011 ]")
![Tuxedo Black Memento Ink Pad [ 132708 ]](https://assets1.tamsnetwork.com/images/EC042017NF/132708s.jpg "Tuxedo Black Memento Ink Pad [ 132708 ]")
![Gorgeous Grape Classic Stampin' Pad [ 147099 ]](https://assets1.tamsnetwork.com/images/EC042017NF/147099s.jpg "Gorgeous Grape Classic Stampin' Pad [ 147099 ]")
![Shaded Spruce Classic Stampin' Pad [ 147088 ]](https://assets1.tamsnetwork.com/images/EC042017NF/147088s.jpg "Shaded Spruce Classic Stampin' Pad [ 147088 ]")
![Blending Brushes [ 153611 ]](https://assets1.tamsnetwork.com/images/EC042017NF/153611s.jpg "Blending Brushes [ 153611 ]")
![Sponge Daubers [ 133773 ]](https://assets1.tamsnetwork.com/images/EC042017NF/133773s.jpg "Sponge Daubers [ 133773 ]")
![Versamark Pad [ 102283 ]](https://assets1.tamsnetwork.com/images/EC042017NF/102283s.jpg "Versamark Pad [ 102283 ]")
![Basics Wow! Embossing Powder [ 165679 ]](https://assets1.tamsnetwork.com/images/EC042017NF/165679s.jpg "Basics Wow! Embossing Powder [ 165679 ]")
![Heat Tool - Uk Plug [ 129054 ]](https://assets1.tamsnetwork.com/images/EC042017NF/129054s.jpg "Heat Tool - Uk Plug [ 129054 ]")
![Iridescent Faceted Gems [ 163368 ]](https://assets1.tamsnetwork.com/images/EC042017NF/163368s.jpg "Iridescent Faceted Gems [ 163368 ]")