Happy Sunday!
Today I’m sharing some simple and stepped up cards created with the Wisteria Wishes bundle by Stampin’ Up! As soon as I saw this stamp set and dies in the new annual cataloguewere they were on my wish list because them brought back some lovely memories of home. My parents had an amazing wisteria plant that produced an abundence of these wonderful blooms in their garden and it just got better year after year.
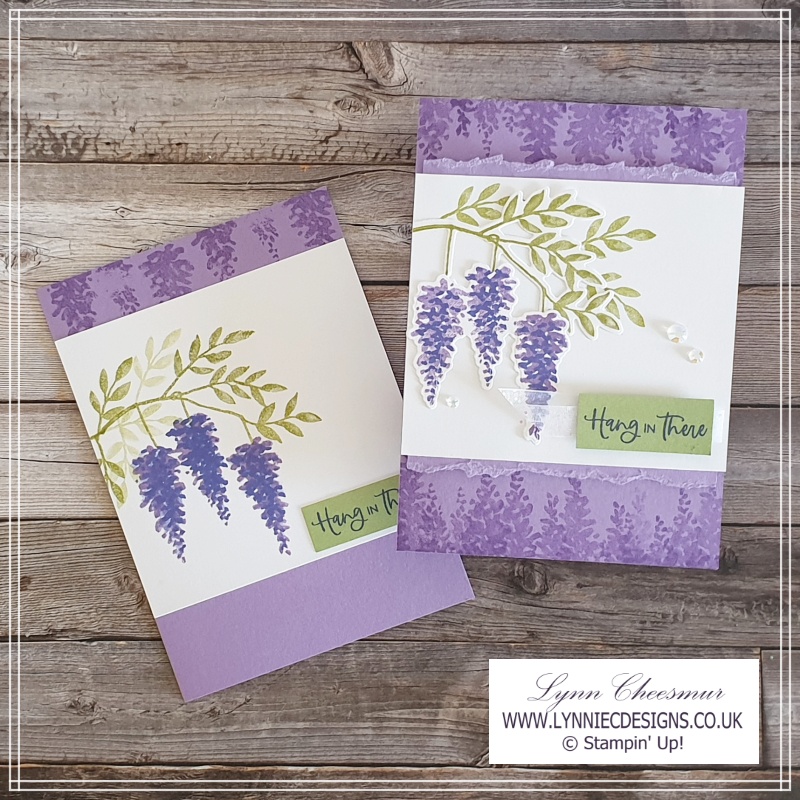
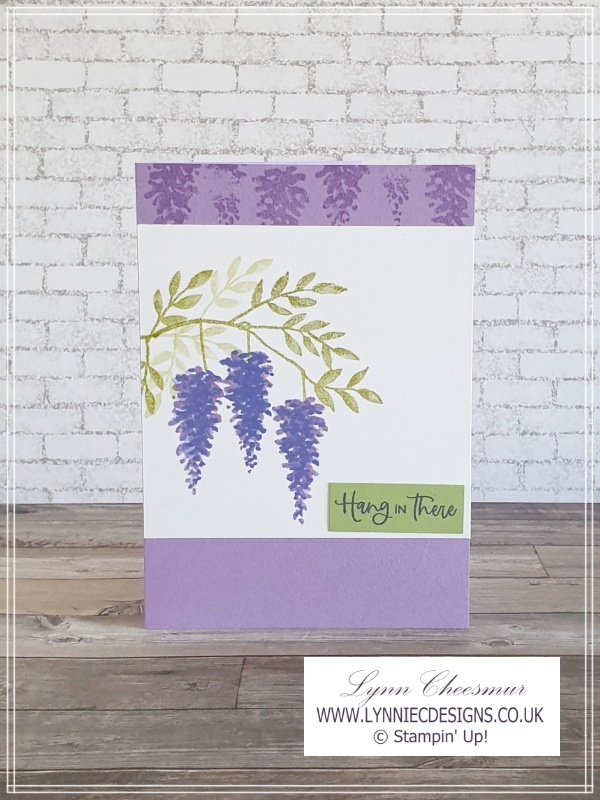
For my first card, I decided to keep it simple using a Highland Heather base with some tone on tone stamping at the top. Next, I stamped the branch and flowers from the Wisteria Wishes stamp set on a piece of Basic White in Pear Pizzazz, Highland Heather and Orchid Oasis. Finally, I stamped the sentiment in Orchid Oasis on a piece of Pear Pizzazz.
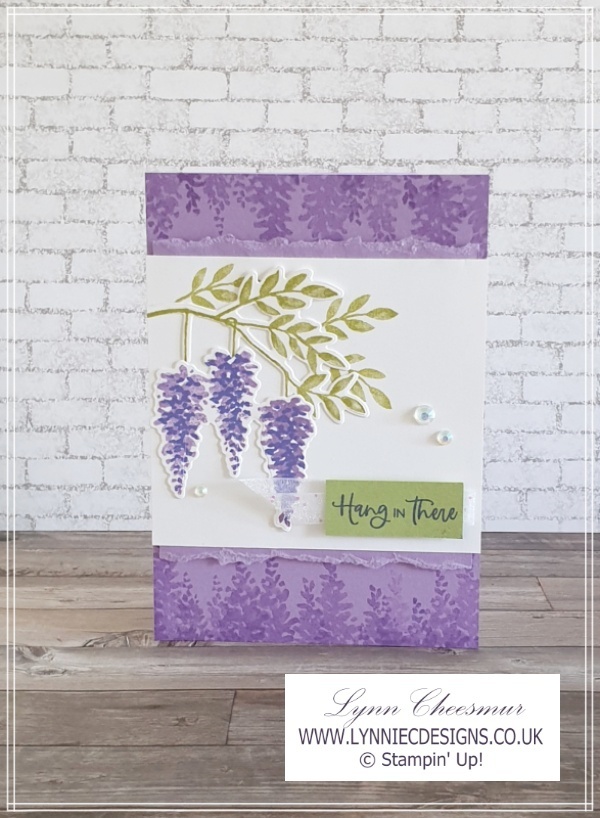
For the stepped up version below, which you can watch me make here or in the video later in this post, the flowers and branch are die cut. Tone on tone stamping on the base is at the top and bottom, which is a great way of making a background. Adding torn pieces of Highland Heather to the top and bottom edges of the white panel give a different look. This panel was added to the base with dimensionals. This time the sentiment panel was added with dimensionals over a piece of glittered ribbon. To add another bit of sparkle I added a few iridescent rhinestones.
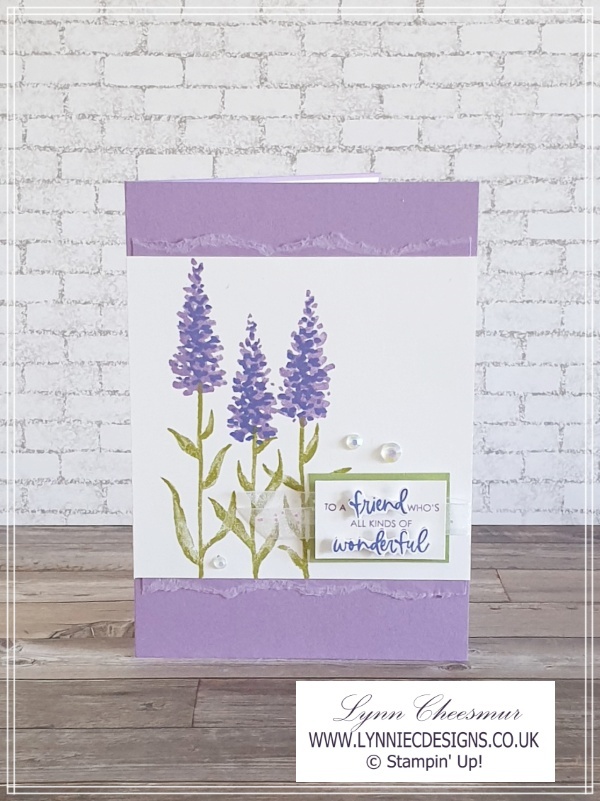
I wanted to use the stems, so below you can see another #simplestamping card and the flowers look like Heather or Delphinimum, in my humble opinion. Again I added torn card to the top and bottom edges of the Basic White panel – the idea is CASED from a card in the annual catalogue. Our catalogues are not only full of wonderful high quality products, they are packed full of cards and projects to copy or use as inspiration for our own projects. The sentiment was stamped twice; once in Highland Heather and a second time in Orchid Oasis so two words could be trimmed and added to the original with dimensionals.
Supplies used to to make the card in the video
Stamps:
Wisteria Wishes Bundle
Cardstock:
Highland Heather 14.8cm x 21 cm – scored at 10.5cm
Basic White 10.5cm x 10cm and 10.2cm x 14.5cm plus half a sheet of A4 for stamping
Highland Heather 10cm x 5cm
Pear Pizzazz scrap for sentiment
Inks:
Highland Heather, Orchid Oasis, Pear Pizzazz
Accessories:
White Glittered Organdy ribbon, Irridescent Rhinestones
Tools and Adhesives:
Tear and Tape, Multipurpose Liquid Glue, Stampin’ Dimensionals
Instructions:
1. Cut and score card base
2. Stamp images and die cut
3. On the panel stamp small leaves, then add branch with leaves and flowers
4. Stamp sentiment, trim and add with dimensionals over ribbon
5. Tear strip of Highland Heather in half and adhere to back of white panel
6. Use flower image to stamp tone on tone on card base and add panel with dimensionals
7. Glue white panel to inside
8. Adhere iridescent rhinestones
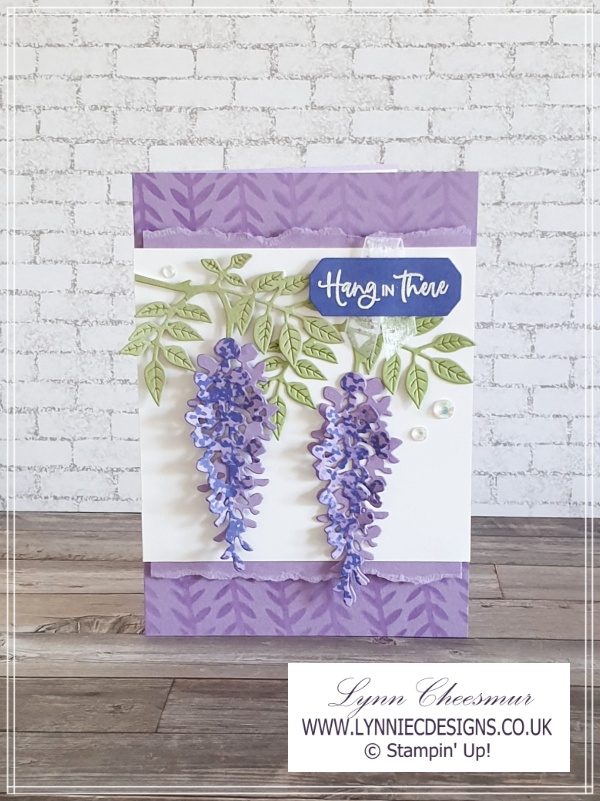
In my final example, I used dies to create the flowers, branches and leaves – so much lovely detail. The background on the card base was created with one of the Butterflies and Layering Flowers decorative masks and a blending brush. The sentiment was heat embossed in white.
You can watch me make the second stamped up version by clicking on the video below:-
All the products used are listed below so you can click on the images to go to that item in my Stampin’ Up! on line store. If your order is over £25 use my current monthly Online Shopper code and I will send you a handmade card and little thank you gift next month. However, should your wishlist be over £99 then you should think about joining our team. The AMAZING joining offer is still available – not only do you get to chose the items you want in your Starter Kit, you only pay £99 and select £130 worth of products. For the rest of this month the Starter Kit also includes £62.50 of FREE 2022–2024 In Color products:
- In Color Grid Paper
- In Color Ink Pad Collection
- In Color A4 Cardstock
- In Color 6″ x 6″ (15.2 x 15.2 cm) Designer Series Paper
Yes, you calculated that correctly ….. £93.50 of FREE items (I’ll say it again AMAZING!!!). Get in touch if you have any questions or if you would like to learn more.
As always, thanks for stopping by and remember to keep it crafty.
Lynn
xxxxxx
